|
Google Apps

8 Google Calendar Tips for Productivity!

The saying “If it’s not on my calendar, it doesn’t exist” is becoming less and less of a joke and more of a reality check as we are faced with ever-increasing distractions.

Let’s see what we can do with Google Calendar to set us up for success!

Resources I mention

  • Emojipedia to add Emojis to Calendar titles (or CTRL + CMD + Space on a Mac)

Watch it in action

Tip #1 - “Cal.New” to Create New Event

For a shortcut to open up a new Google Calendar entry, simply:

  1. Press “CMD+T” or “CTRL+T” if you’re using a PC to open a new tab
  2. Type in “cal.new” in the address bar

This shortcut works for both the Google Chrome and Safari browsers.

🌟
Pro Tip: Typing “doc.new”, “slides.new”, “sheets.new” will open a new Google Doc, Google Slides, and Google Sheets respectively.

Tip #2 - Change Default Reminder Time

Want to get a notification just in time for your next meeting? Here’s how you do it.

  1. Go to your calendar home page > click on “Settings” in the top right corner (type “S” for the settings shortcut)
  2. On the left sidebar, select “Settings for my calendars” > click on your calendar
  3. Go to “Event Notifications” and change the number of minutes to whatever you wish

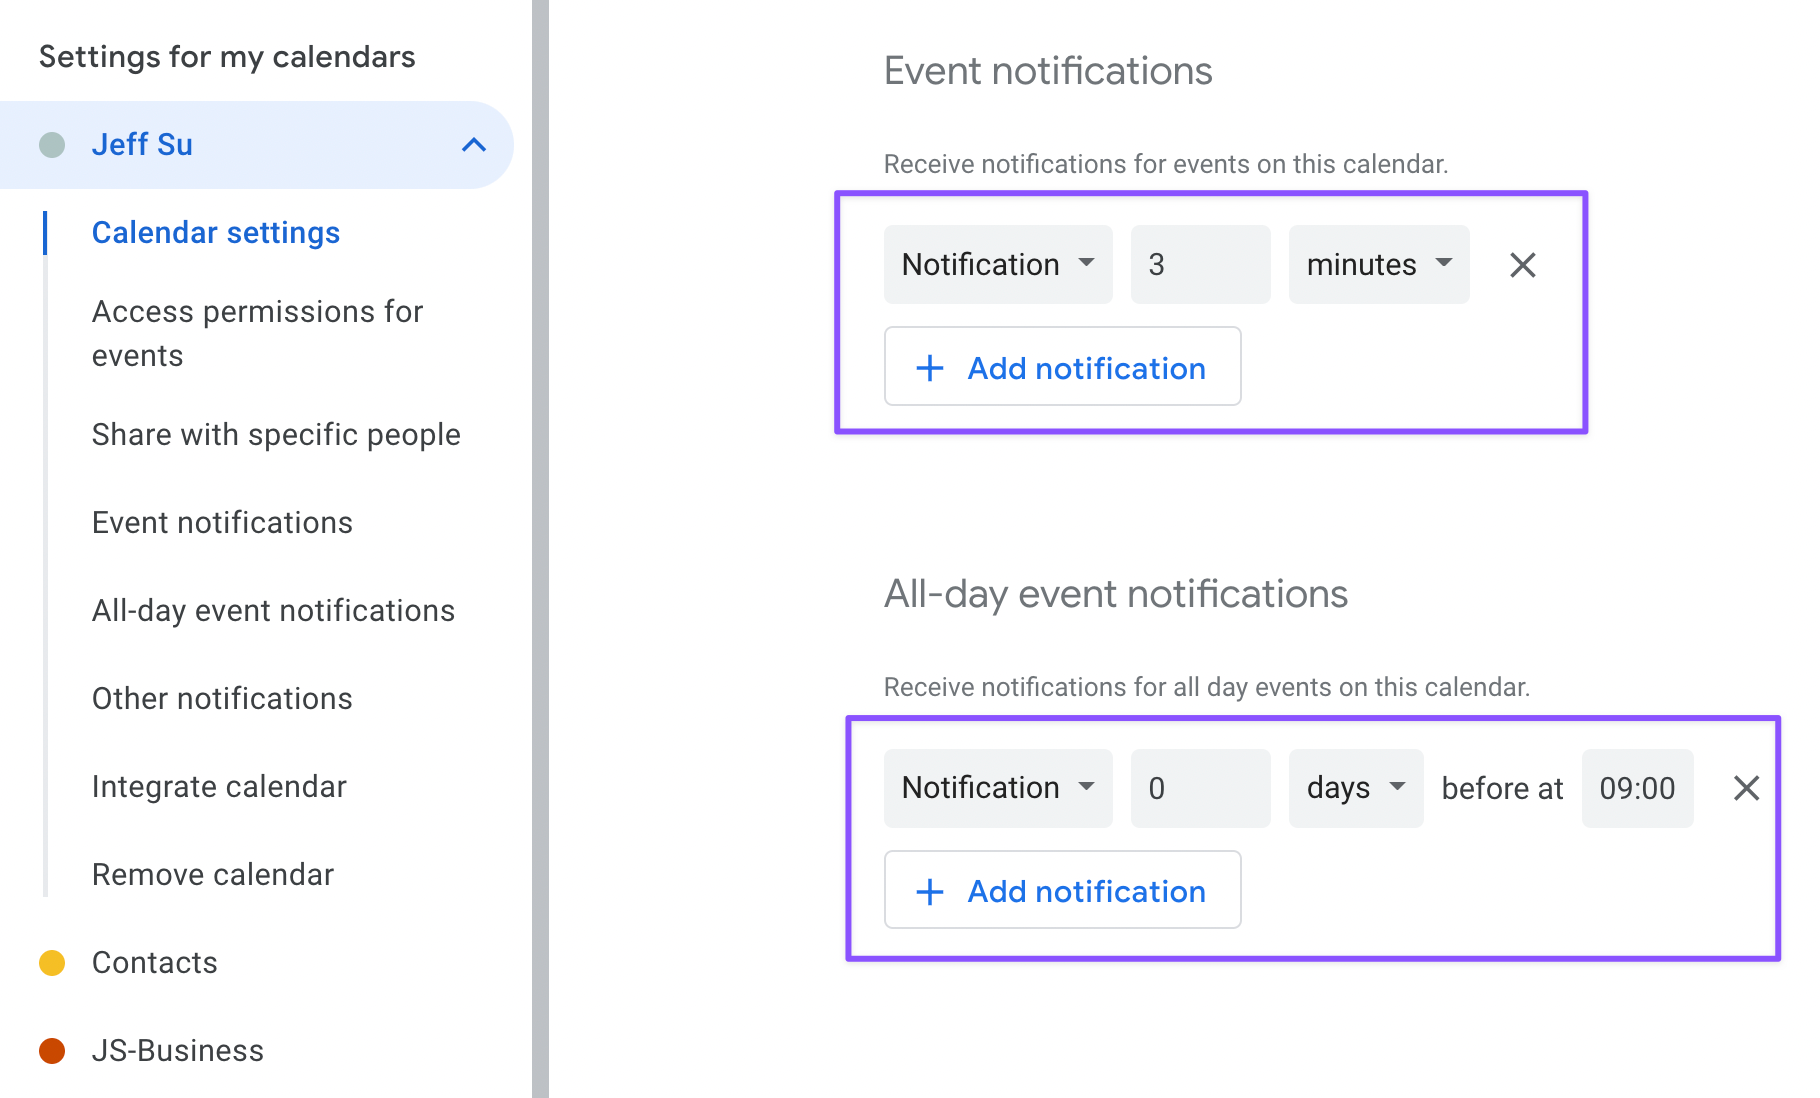
Personally, I find that 2-3 minutes is just enough time to wrap up whatever I’m doing and head to the next meeting.

Tip #3 - Grant Default Modify Access

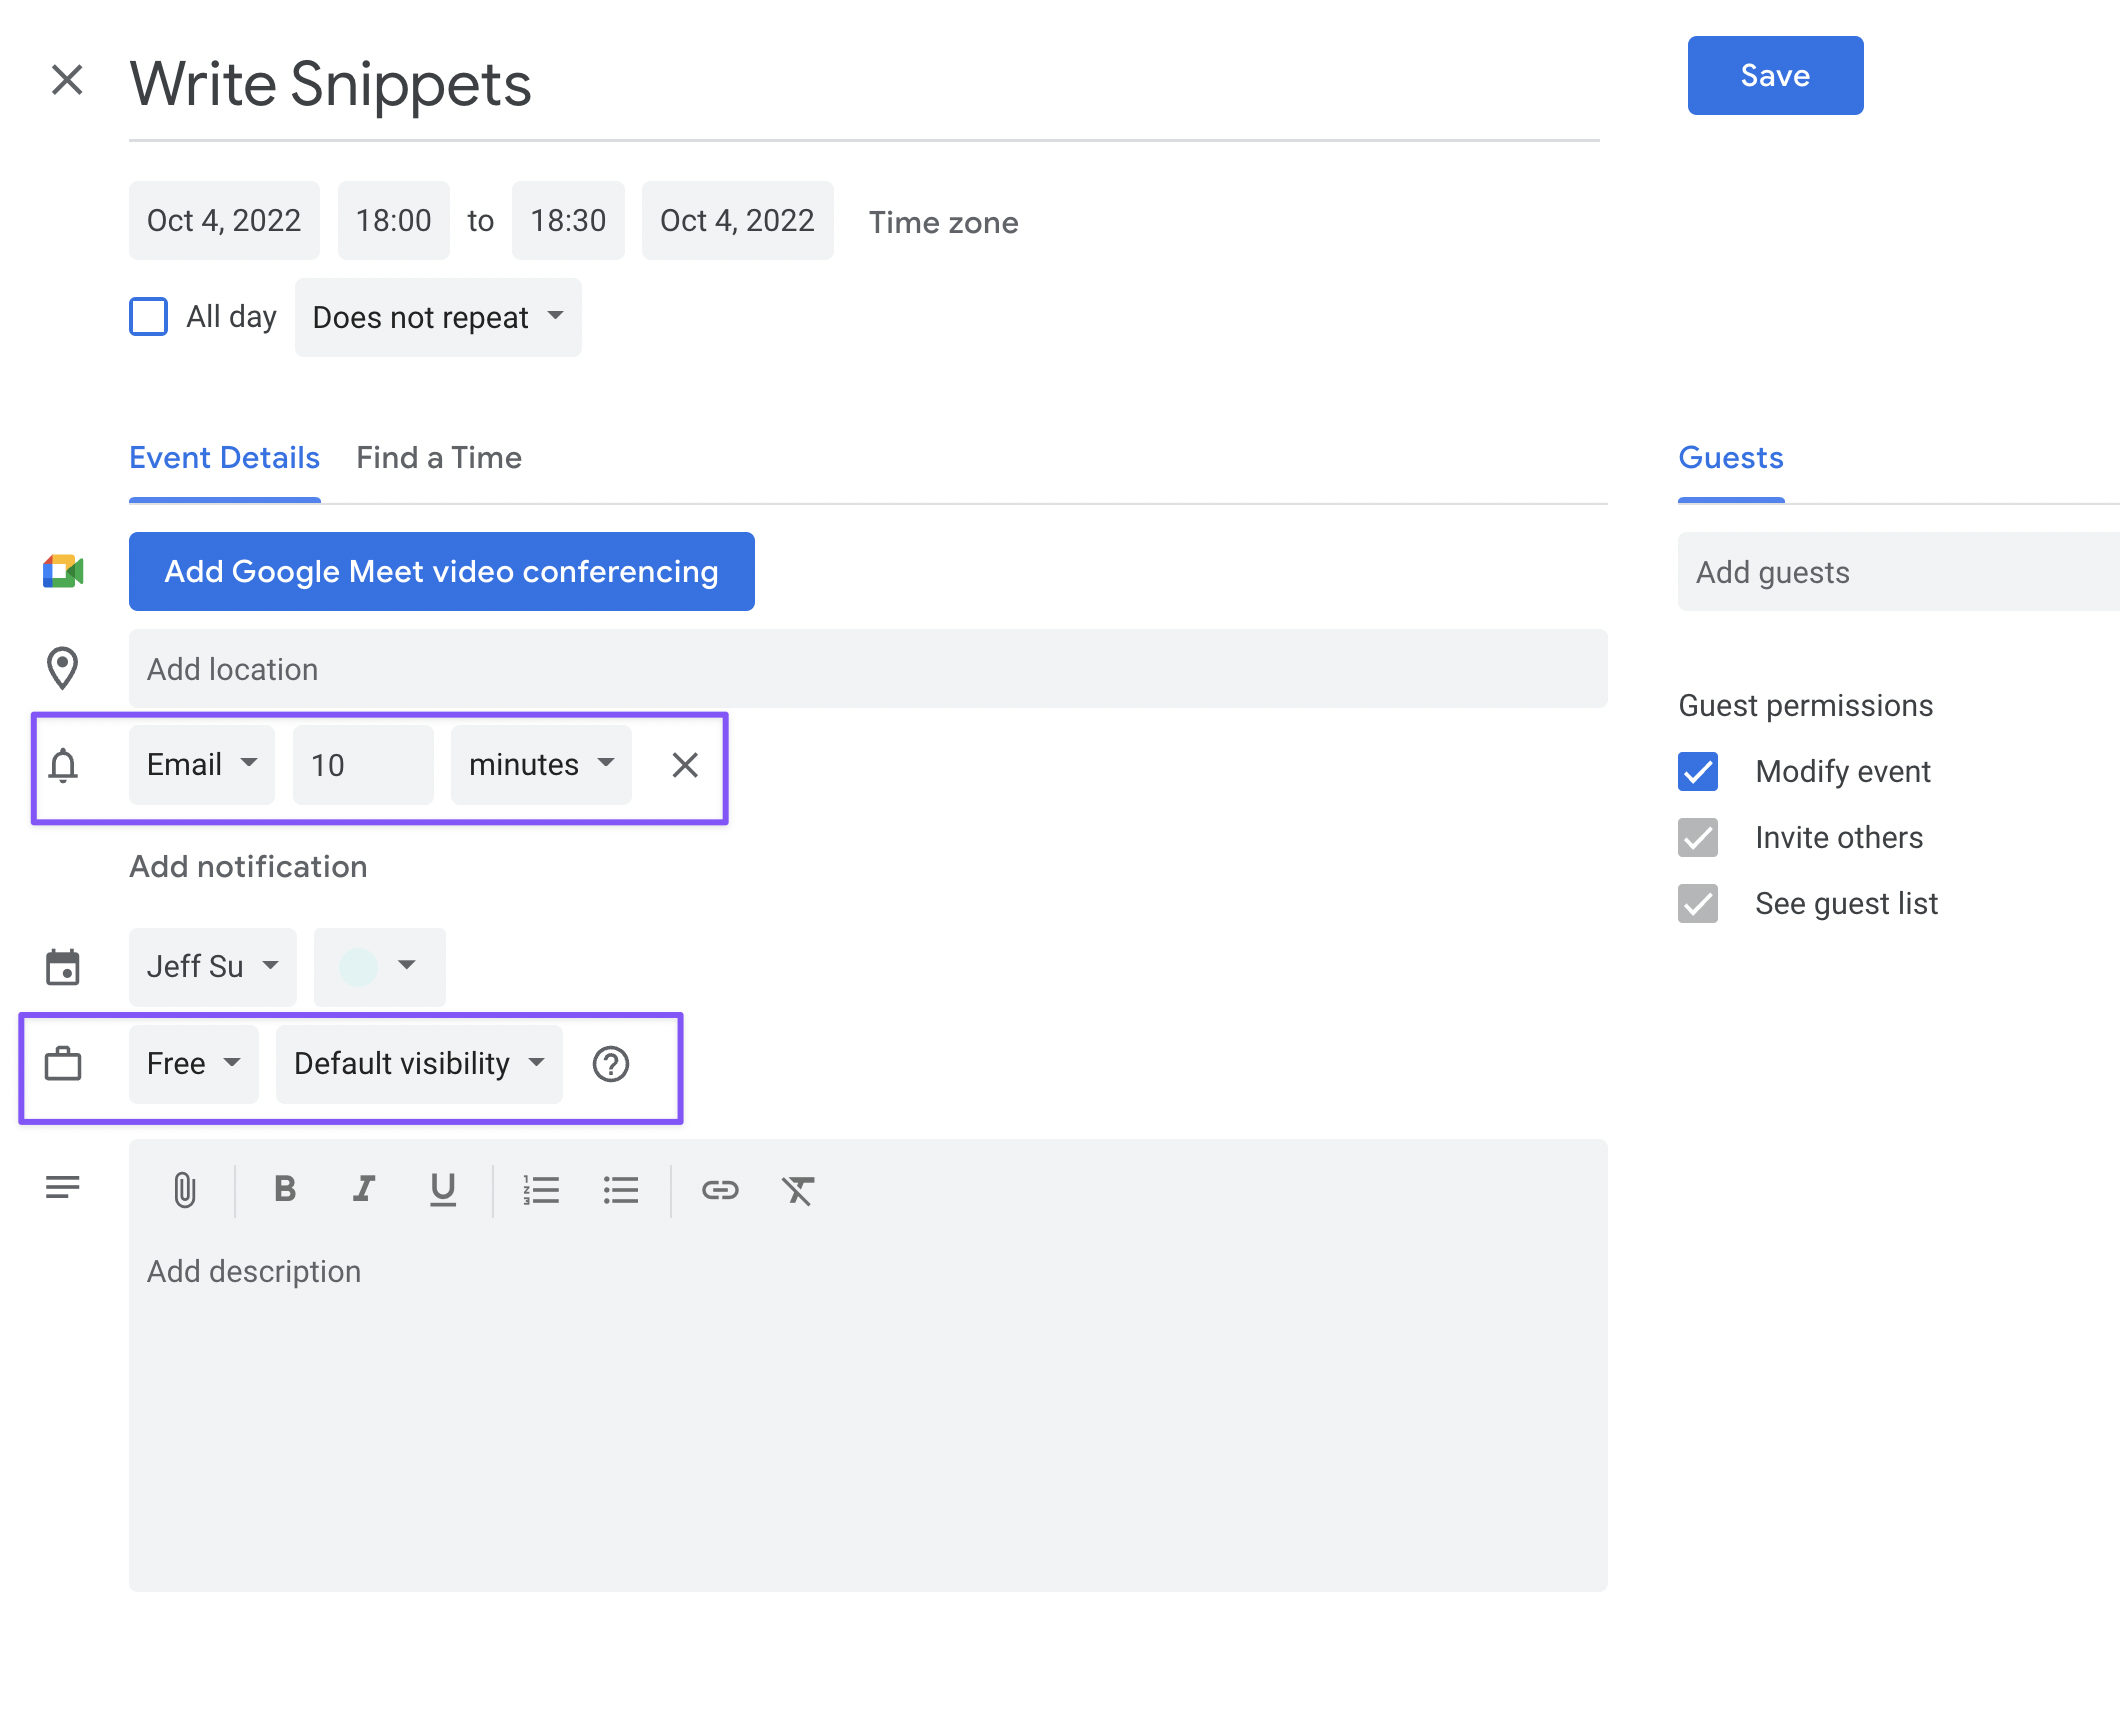
By default, your calendar invite should be modifiable by others. This just saves a lot of time, trust me.

  1. In the settings tab, go to “General” > “Event Settings”
  2. Under “Default Guest Permissions”, check “Modify Event”

If the time slot doesn’t work for the person you sent the invite to, they can change to a new time without having to ping you first. And if you don’t want someone to edit the event details by mistake? Simply uncheck the “modify event” option for that specific event.

Tip #4 - Display Multiple Time Zones

  1. In the settings menu, go to “General” > “World Clock”
  2. Now you can add as many time zones as you want
🌟
Pro Tip: You can enable a secondary time zone in the “Time Zone” section that will display that time when you schedule an event along with your primary time zone

Tip #5 - Add Invisible Events

These are calendar events that only you can see while having that time slot still shown as “available” to others.

  • After creating a new calendar event, change the “Busy” option to free and “Default visibility” to private.

Tip #6 - Add Gmail Filter to Calendar Event

This tip is useful if you have recurring action items—every week or every month.

For example, let’s say I have an invisible calendar event every Tuesday reminding myself to write snippets by end of day.

  1. I can change the notification for this specific recurring action item to “Email”
  2. Go to my Gmail and create a filter with the fields from: calendar-notification@google.com, and has the words “snippets”
  3. Select create filter and apply the label “Follow up”

The next time this event occurs, you will receive an email notification pre-labeled with the follow up tag so you will not forget to work on it.

Tip #7 - Receive Daily Agenda Email

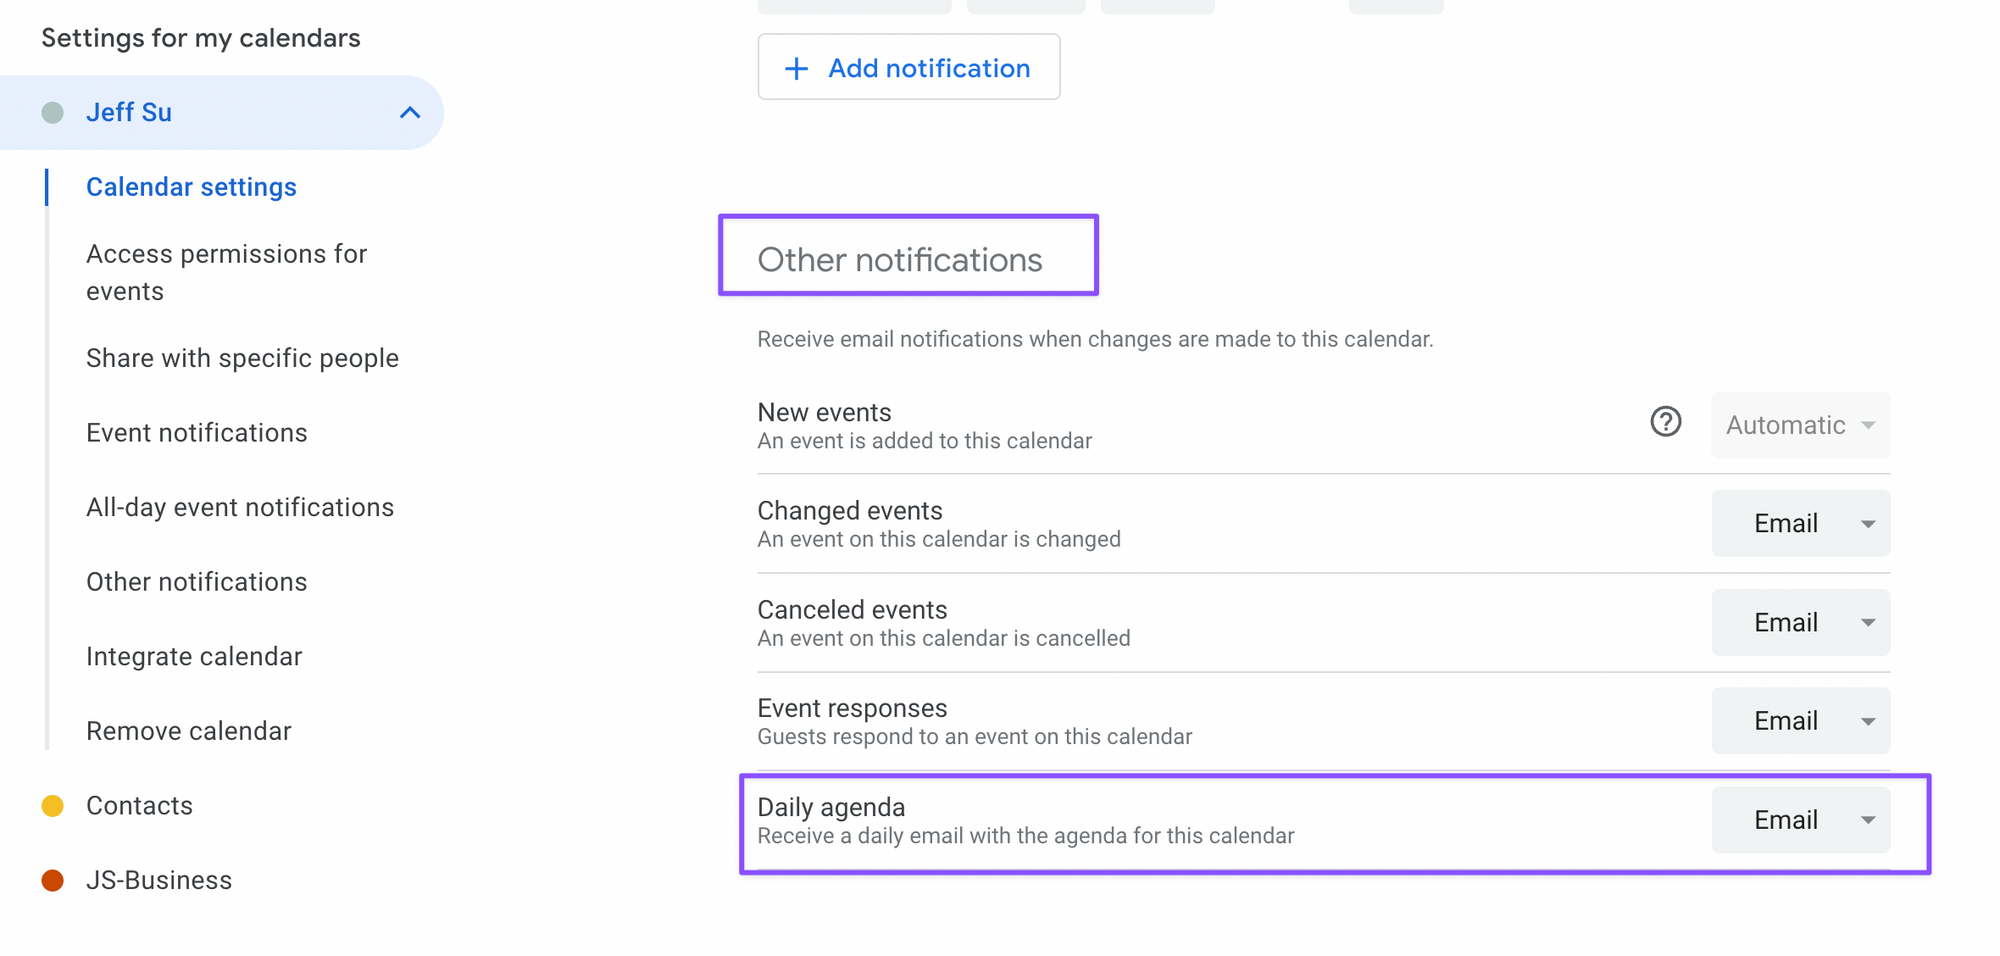
For all of you who have a terrible habit of checking their schedule for the upcoming day—pay attention.

  1. Go to the Settings menu > “Settings for my calendar” > go to Other Notifications
  2. Under “Other notifications”, select “Email” under the dropdown menu for Daily agenda

Now, you’ll receive an email everyday at 5AM with that day’s activities…whether you like it or not.

  1. In the Calendar homepage, click the magnifying glass in the top right corner (this will bring up the search bar)
  2. Click the drop down arrow to see advanced filters

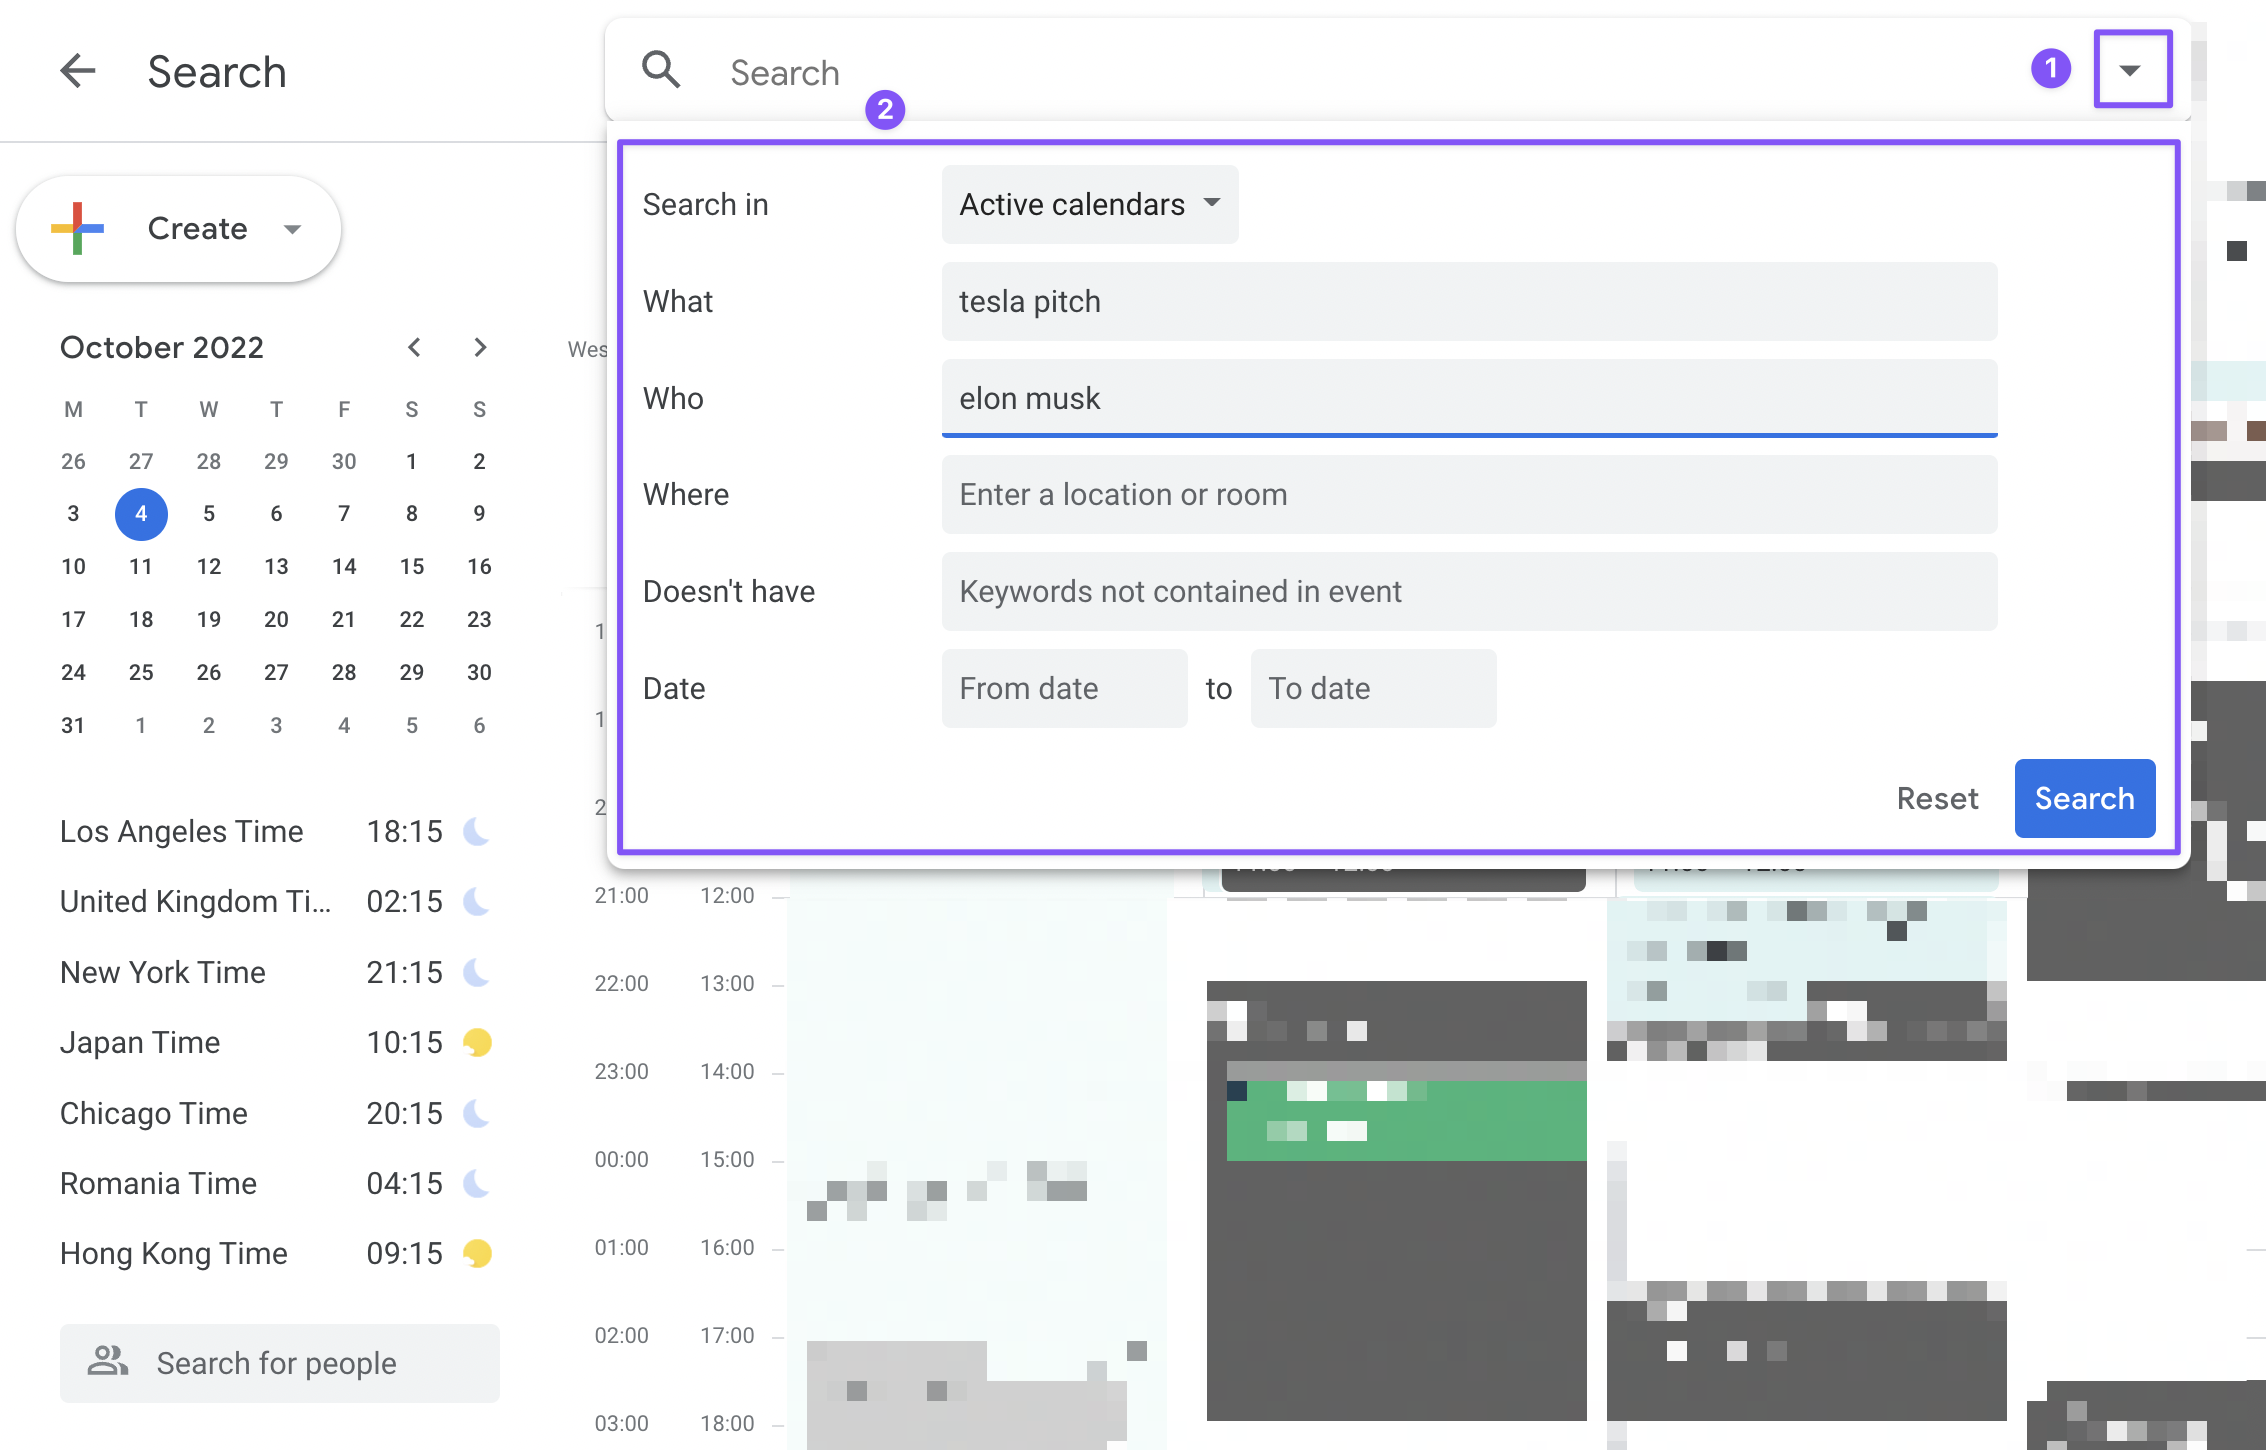
Now you can filter by keywords, who attended the meeting, where it took place, and even a date range.

Bonus Tip - Find a Calendar Quickly

It can get annoying to search for 1 person to view their calendar once you start having multiple contacts. What you can do is:

  1. Under your calendars on the sidebar, click the three dots and select “Settings and sharing”
  2. Now you can change the name of the calendar to place this person at the top—it’s ordered alphabetically
  3. Adding a_ or * will automatically bring their name to the top

If you’re not boring then I would head over to emojipedia and add an emoji that reminds you of that person and they’ll automatically be placed up top. 😉

Adding on to tip #6…

Check out my inbox zero video to create labels within your email and set up a pre-label system!