The Truth about Full-Time Jobs (when you have a side hustle)
| Growth
Think—if a new hire were to join today and open the spreadsheet, would they be able to understand what’s going on? 🤔
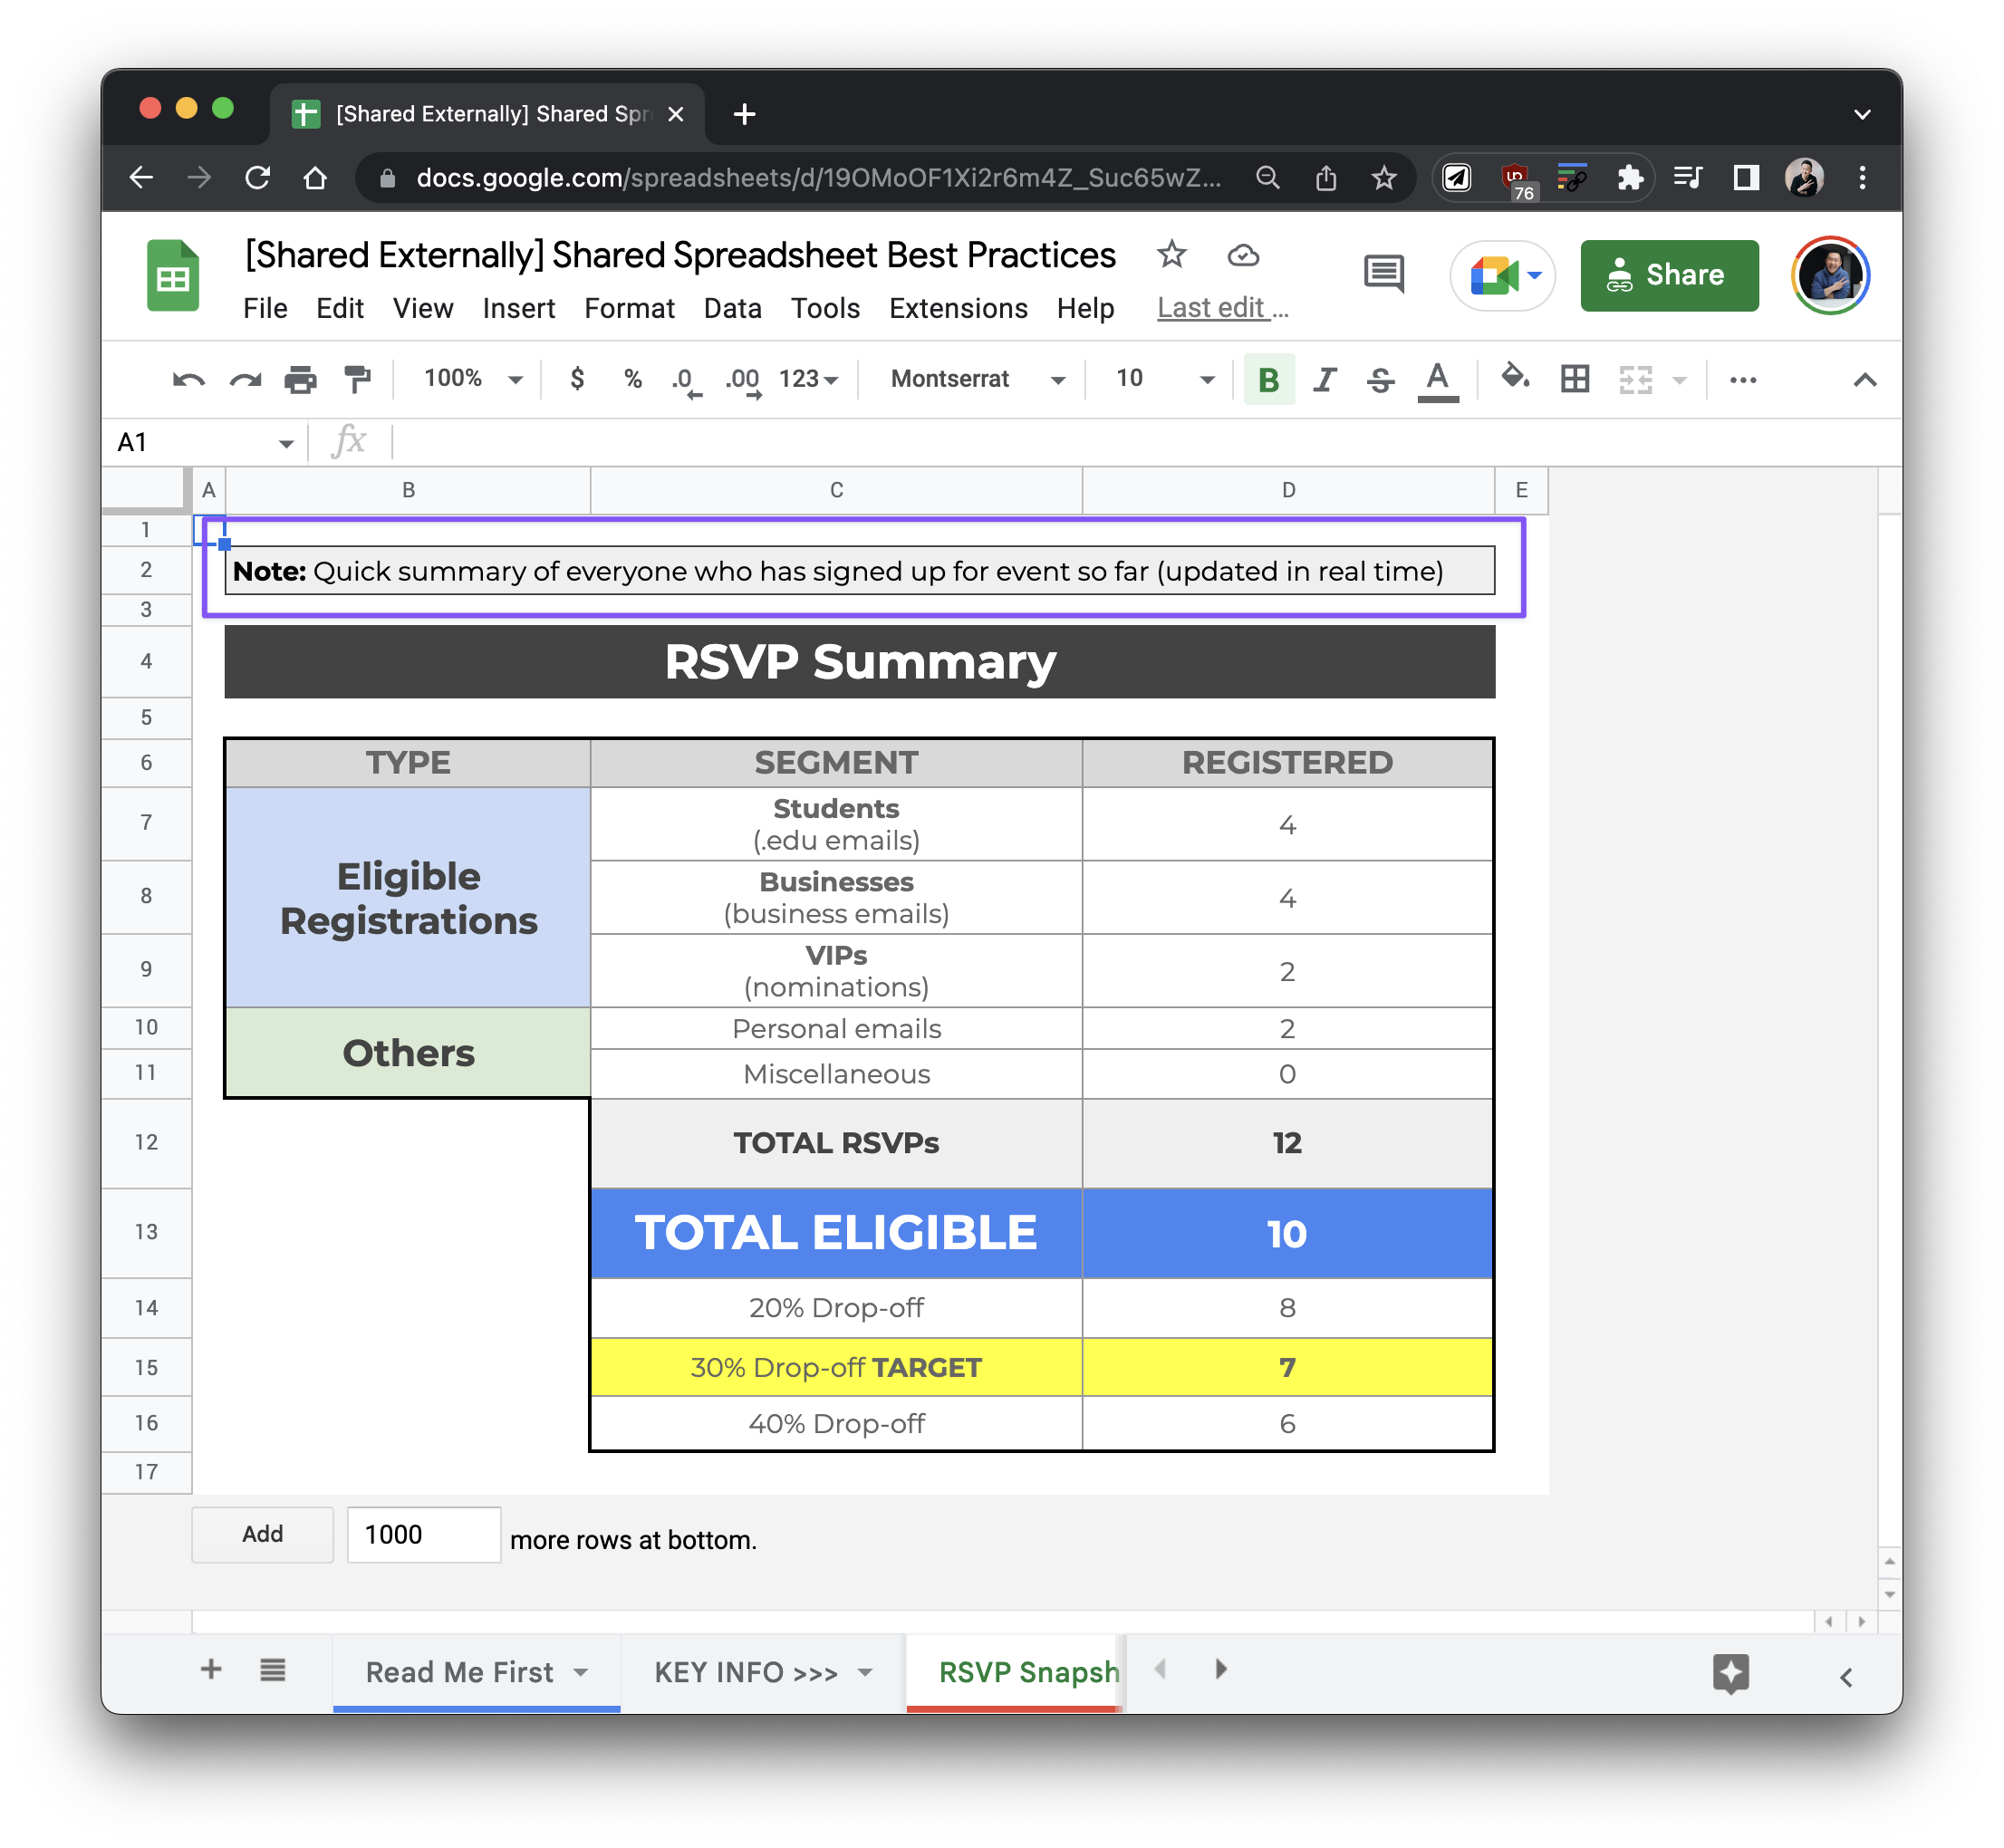
It’s very useful to include 1-2 sentences on the top left hand corner explaining what each tab contains. This could also be used if you need to add instructions that other people need to input information.
If there’s a deadline for when action needs to be taken, make it LARGE and OBVIOUS.
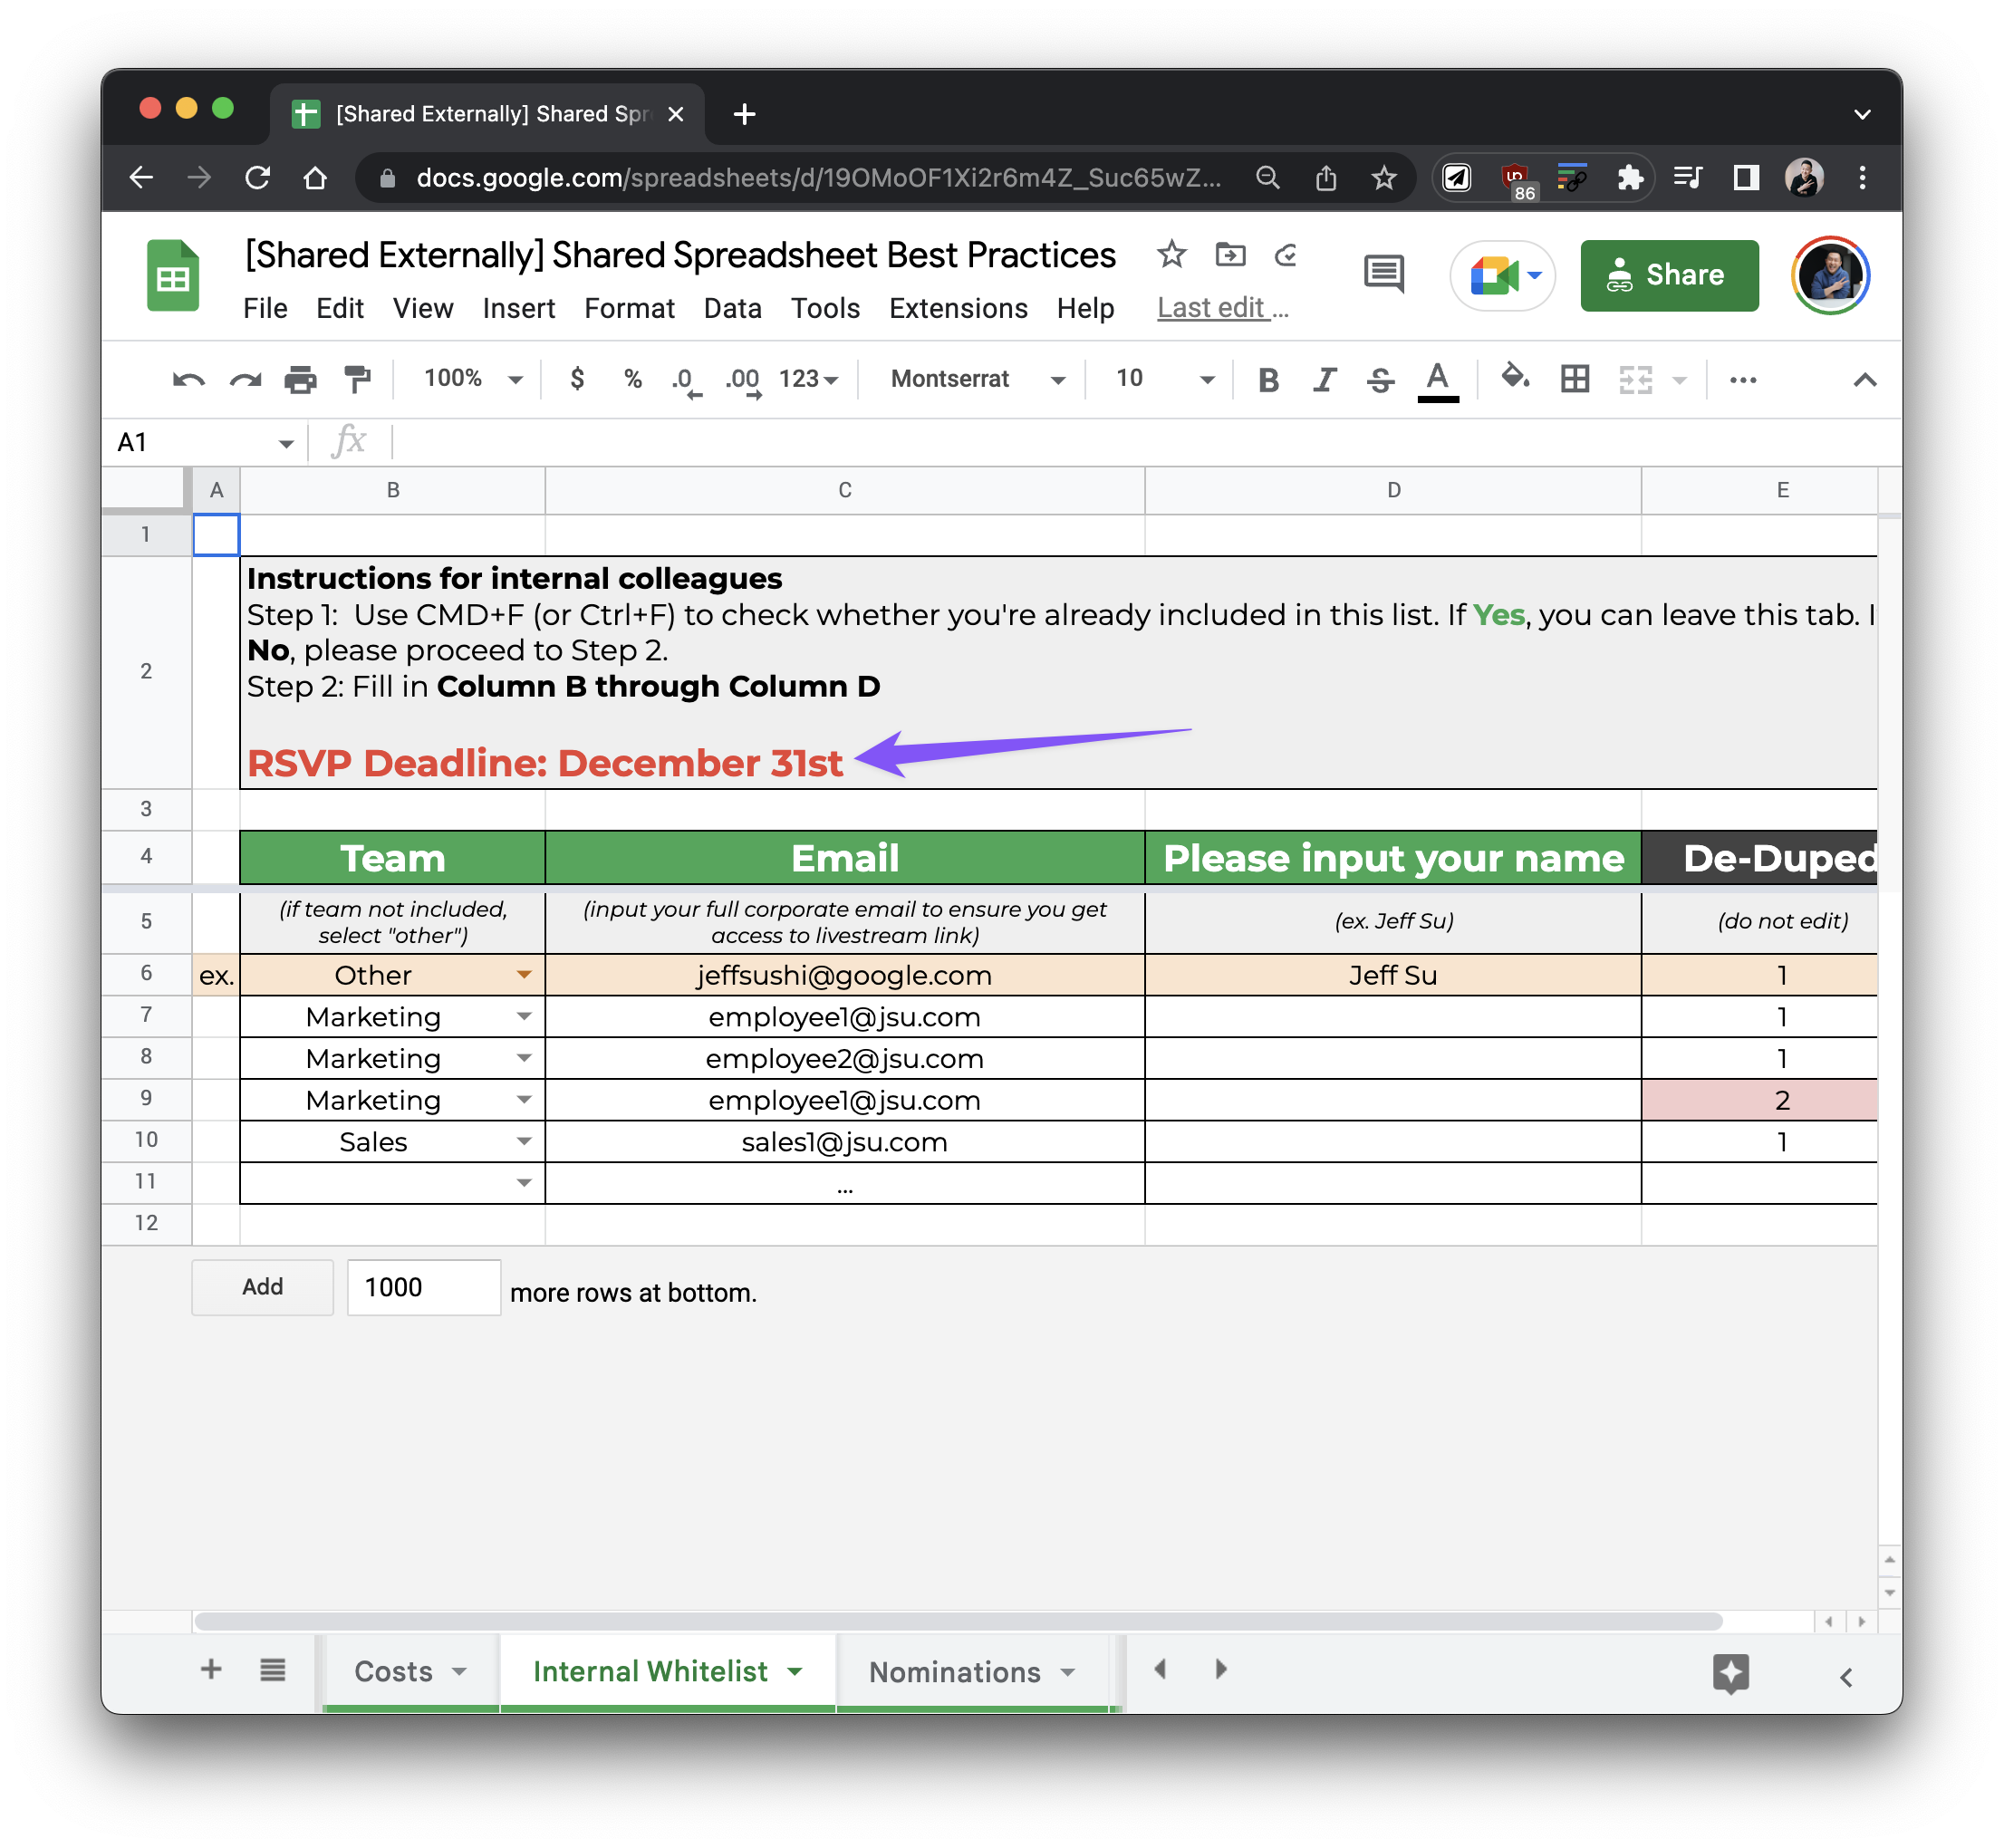
The sales team can never use the excuse "Oh I didn't know" again 😉
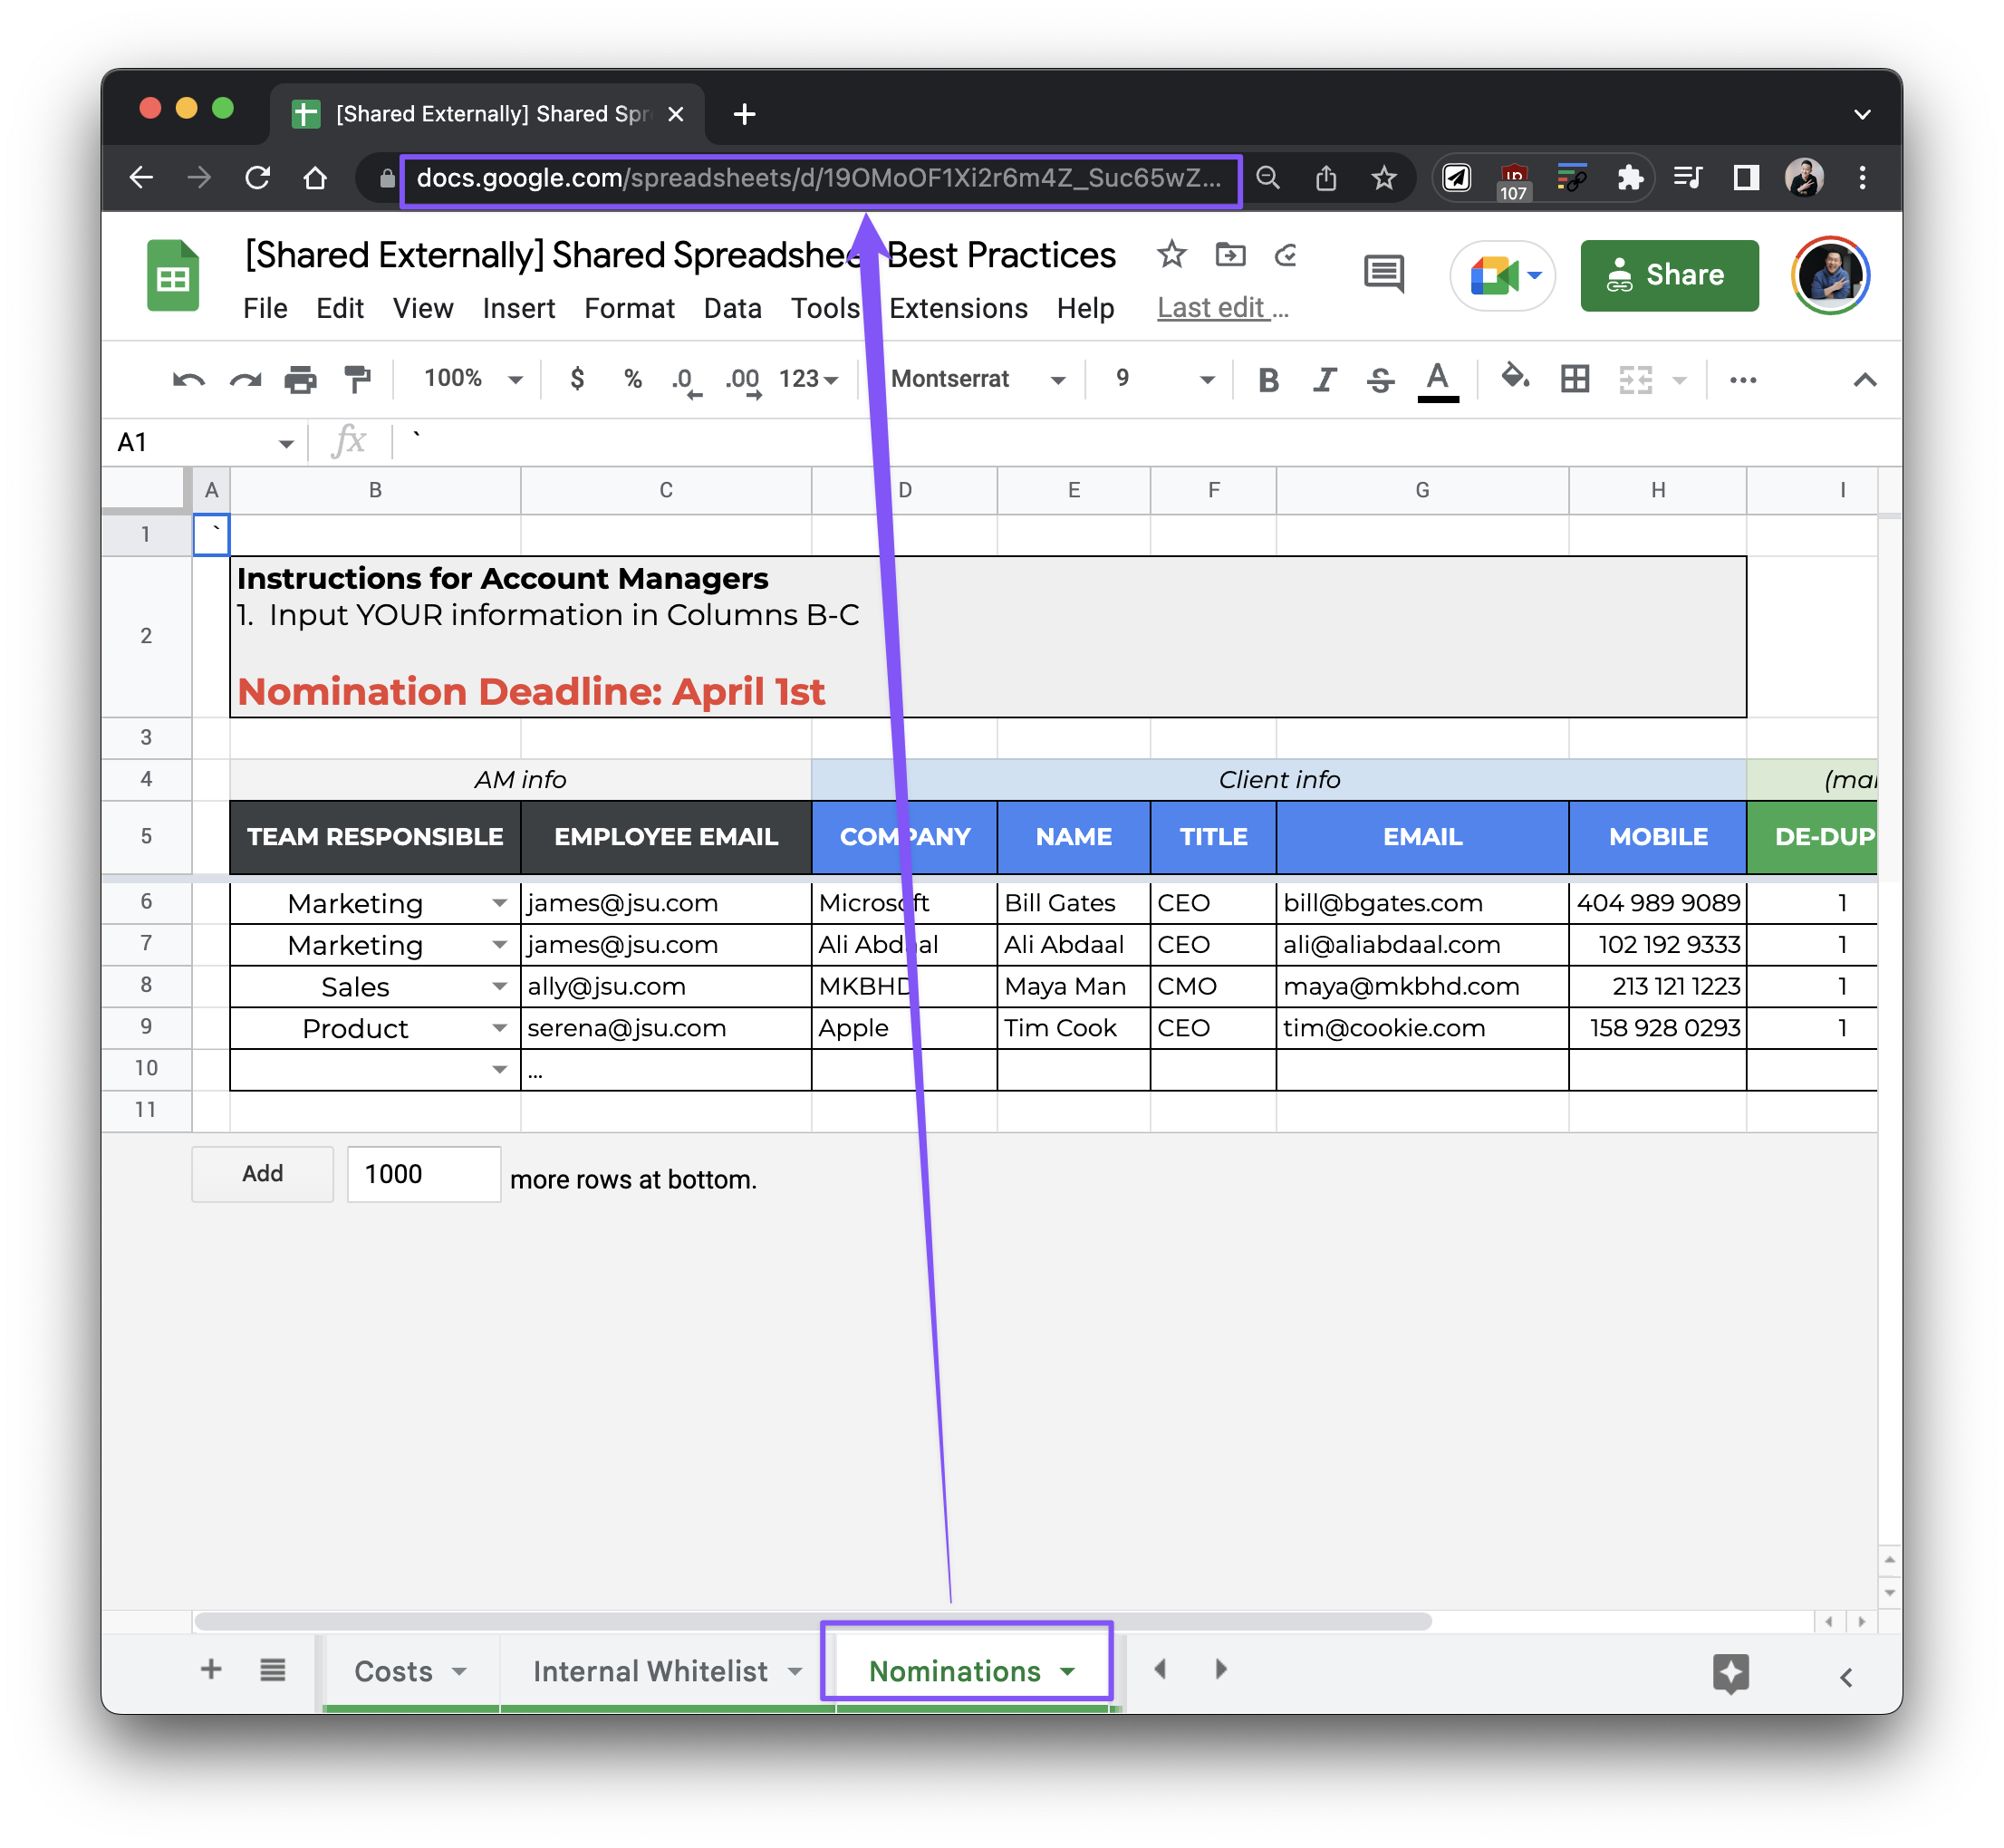
If you want to make sure someone lands on a specific tab, make sure to copy the URL of that specific tab.
It’s helpful to include a row below your header that explains what should be filled in. I like to call this the example row, or the “helper row”.
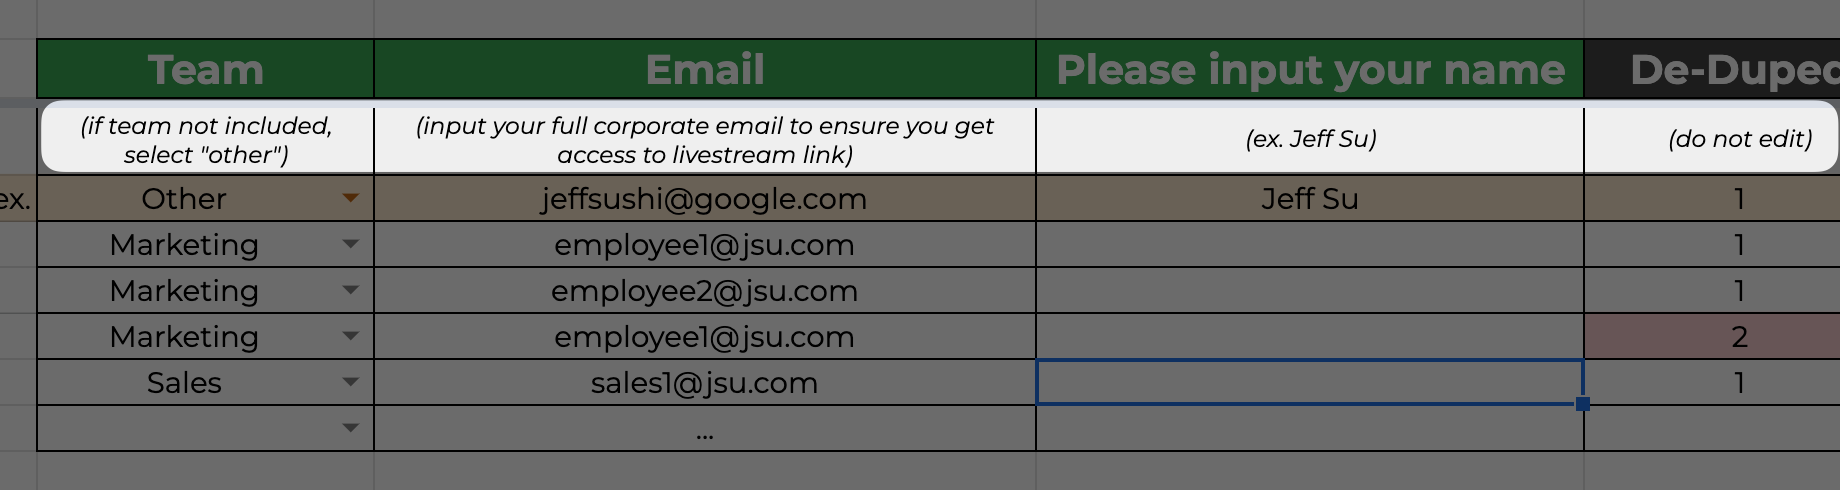
For example, if you only want to include 3 input options for a column:
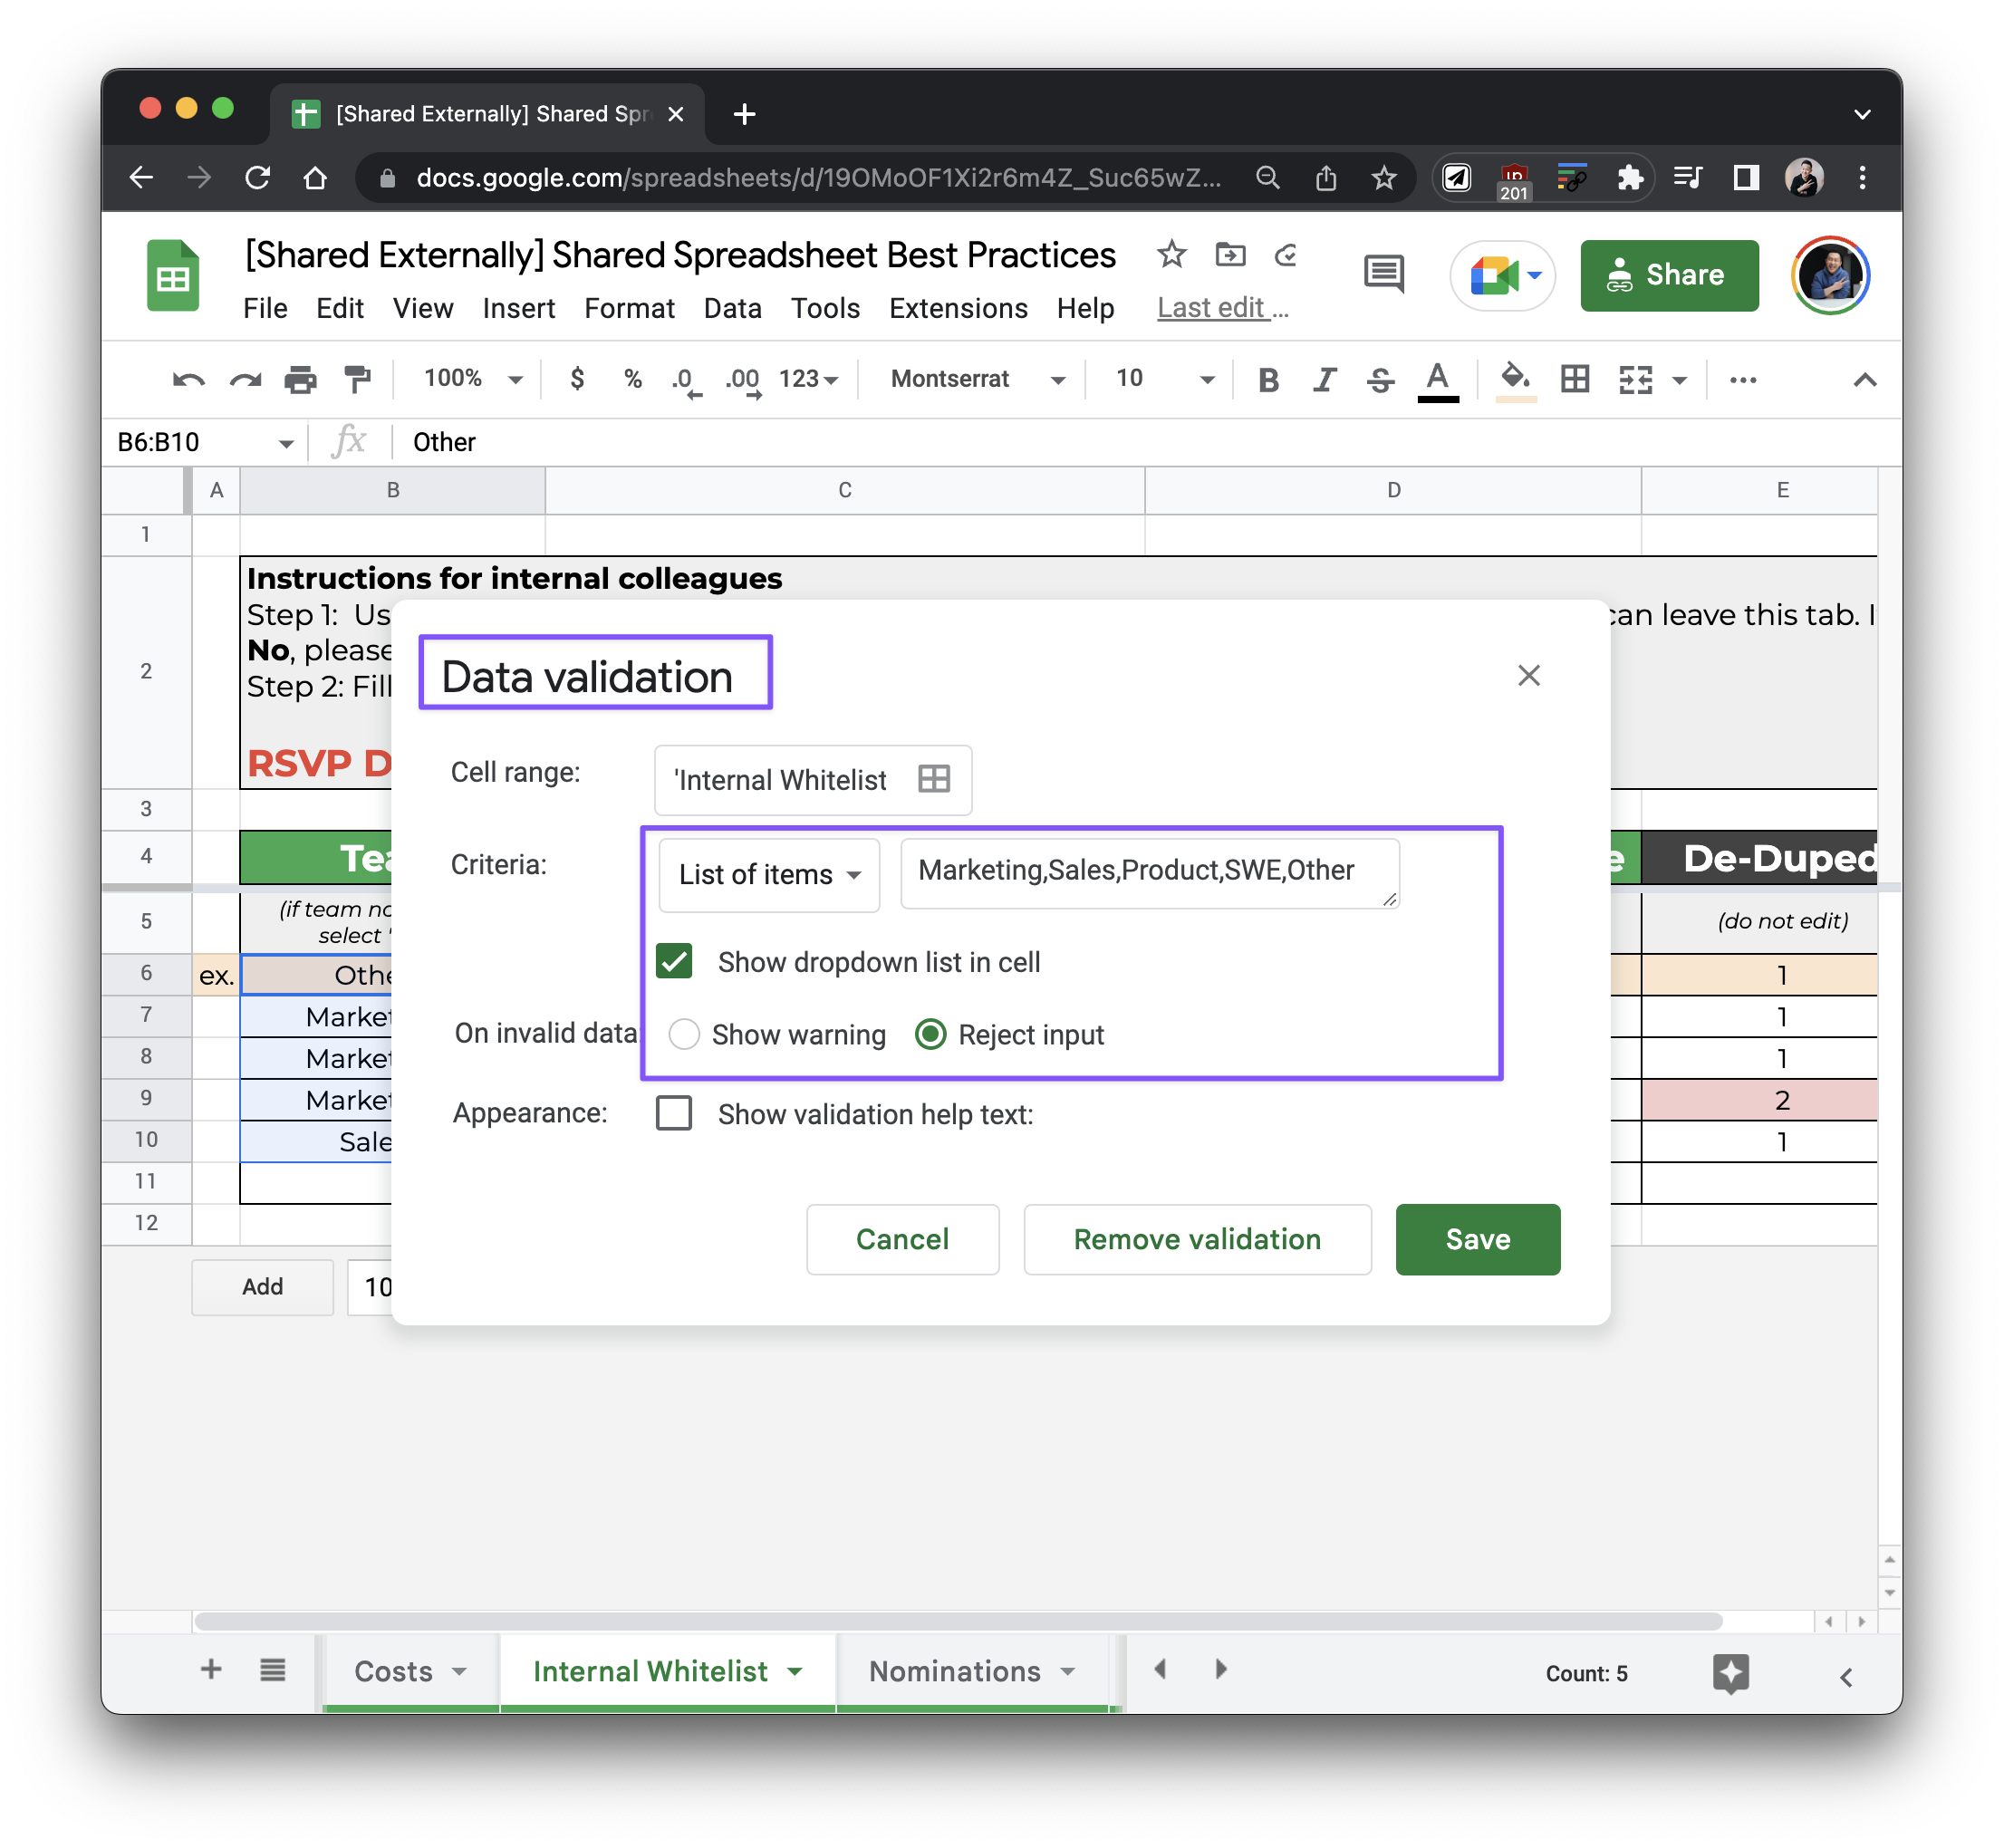
This is essential if another formula is dependent on the value of these cells!
Let’s say we want to forecast 3 possible scenarios—ad spend increase of 20%, 30%, and 40%.
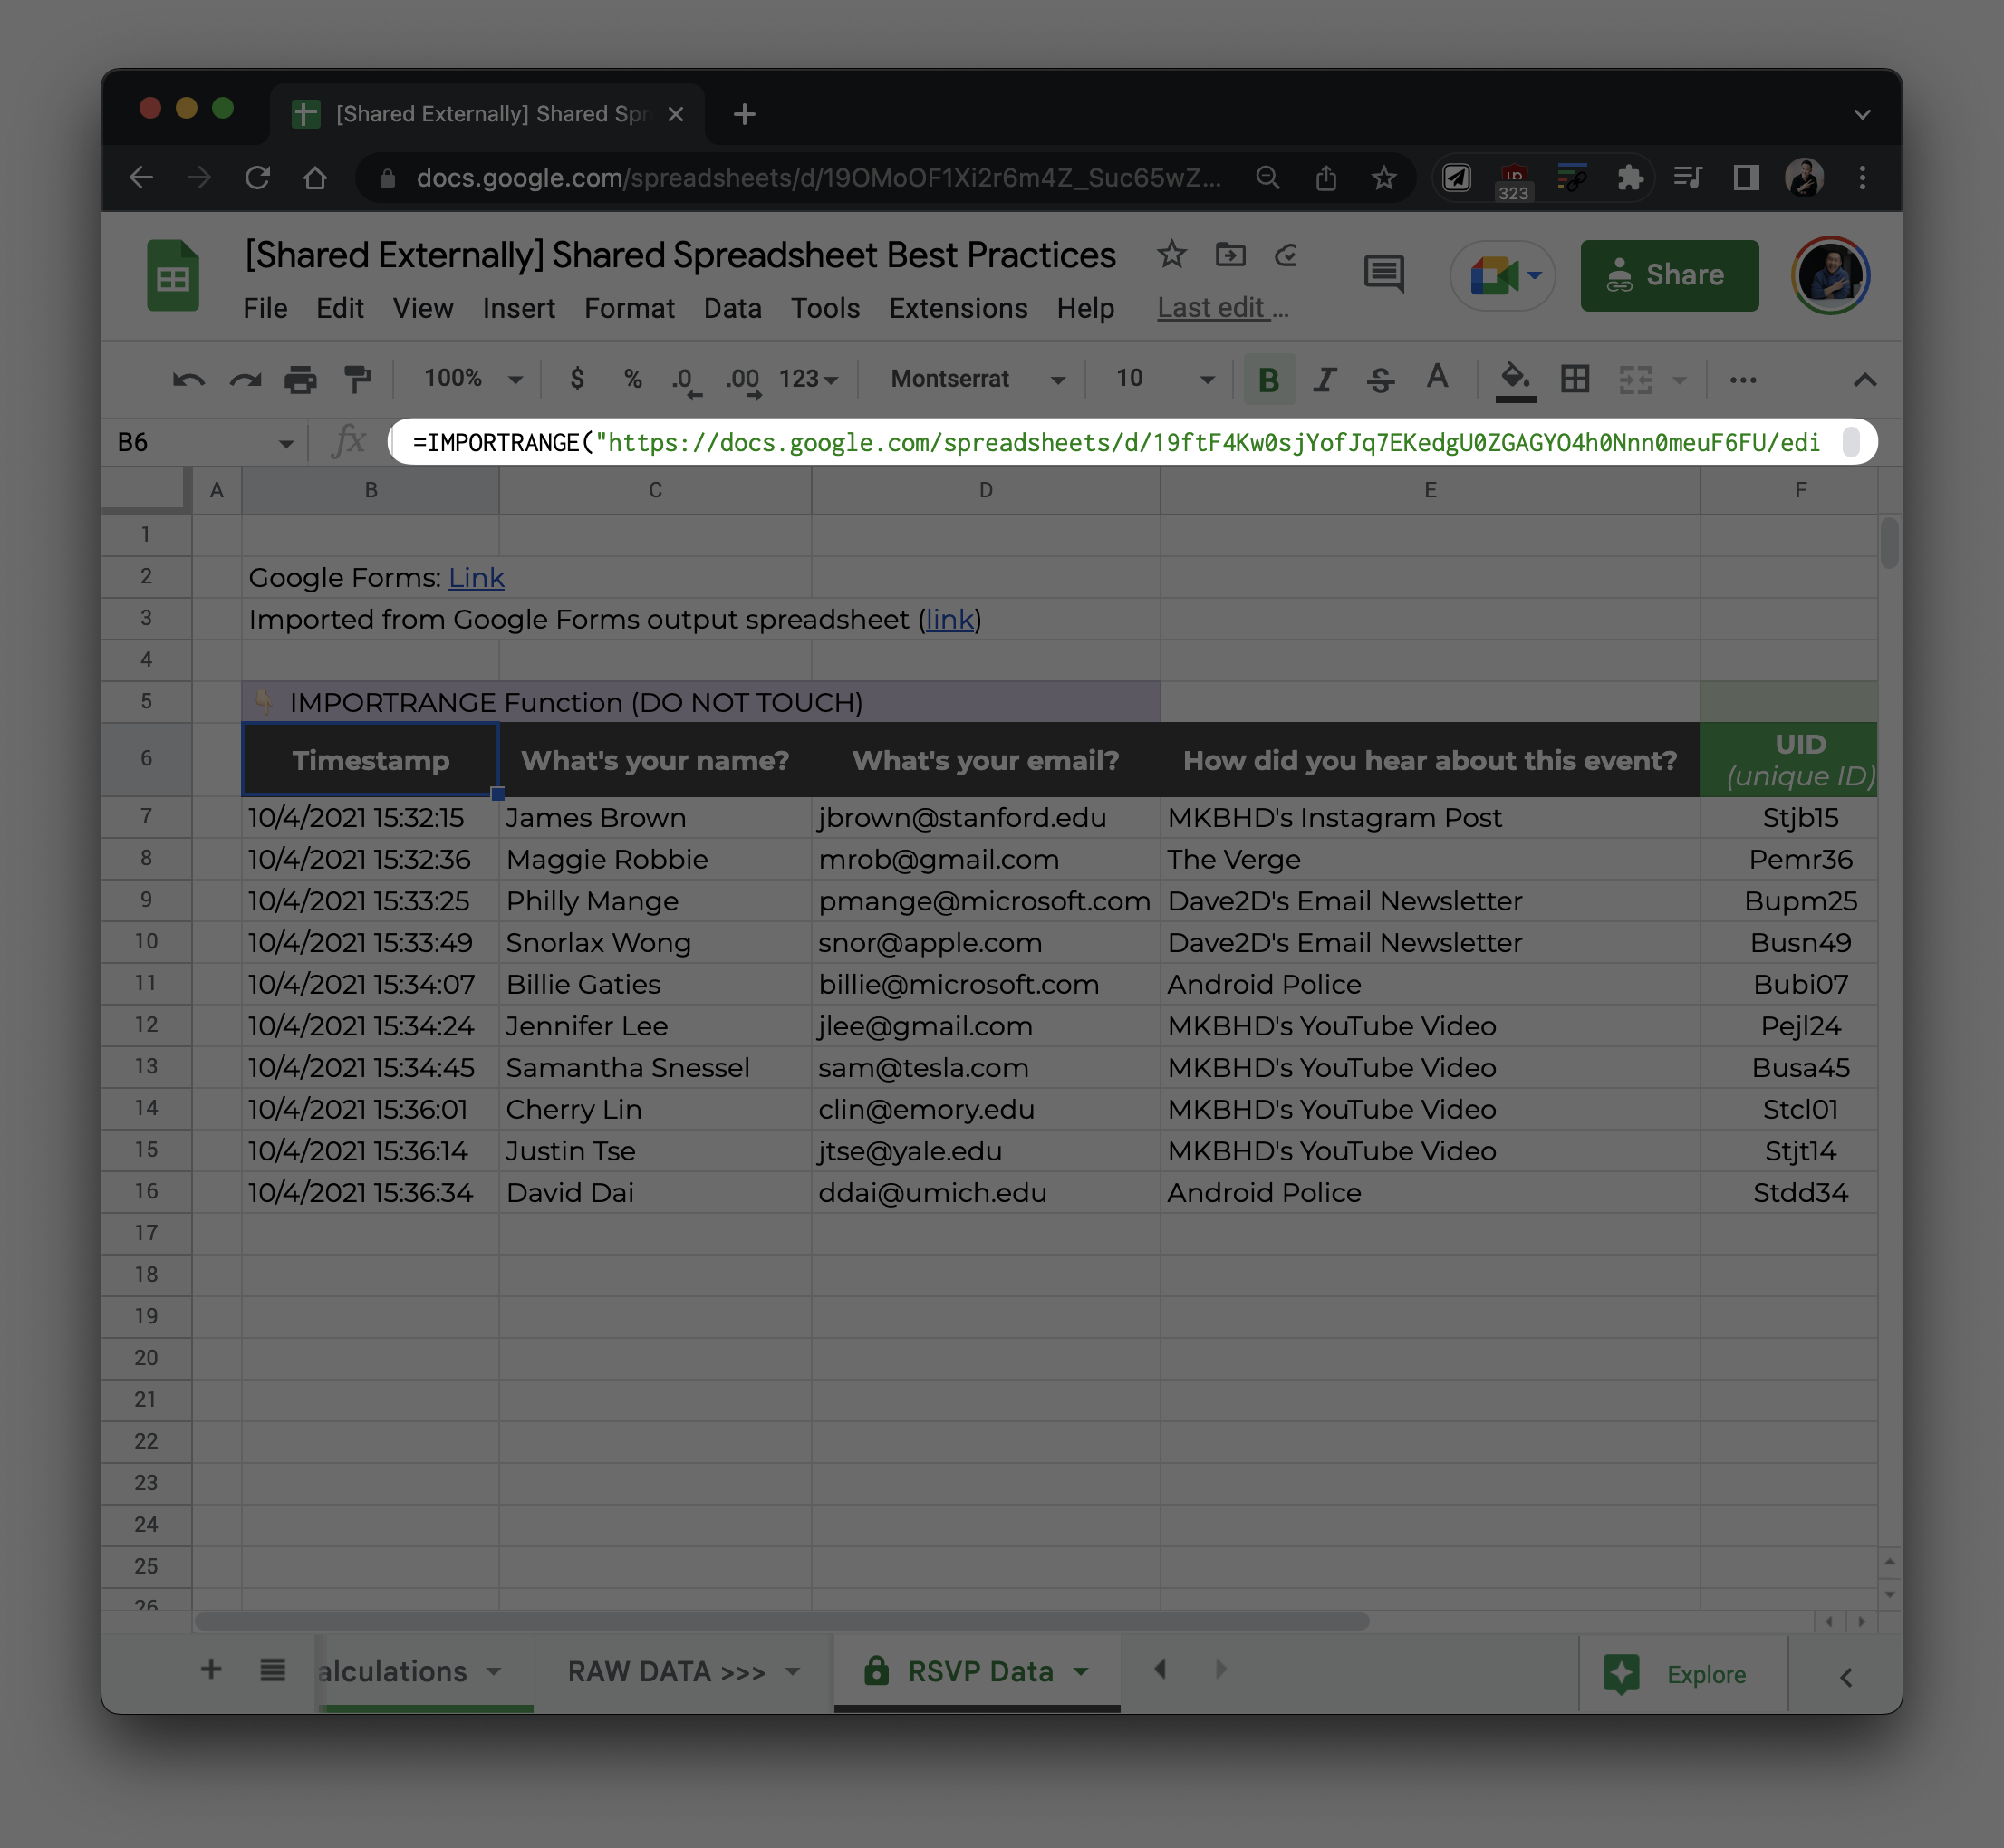
I recommend using the ImportRange function to import raw data. If someone were to accidentally overwrite the data, it won’t mess up your spreadsheet! I talk more about it here.
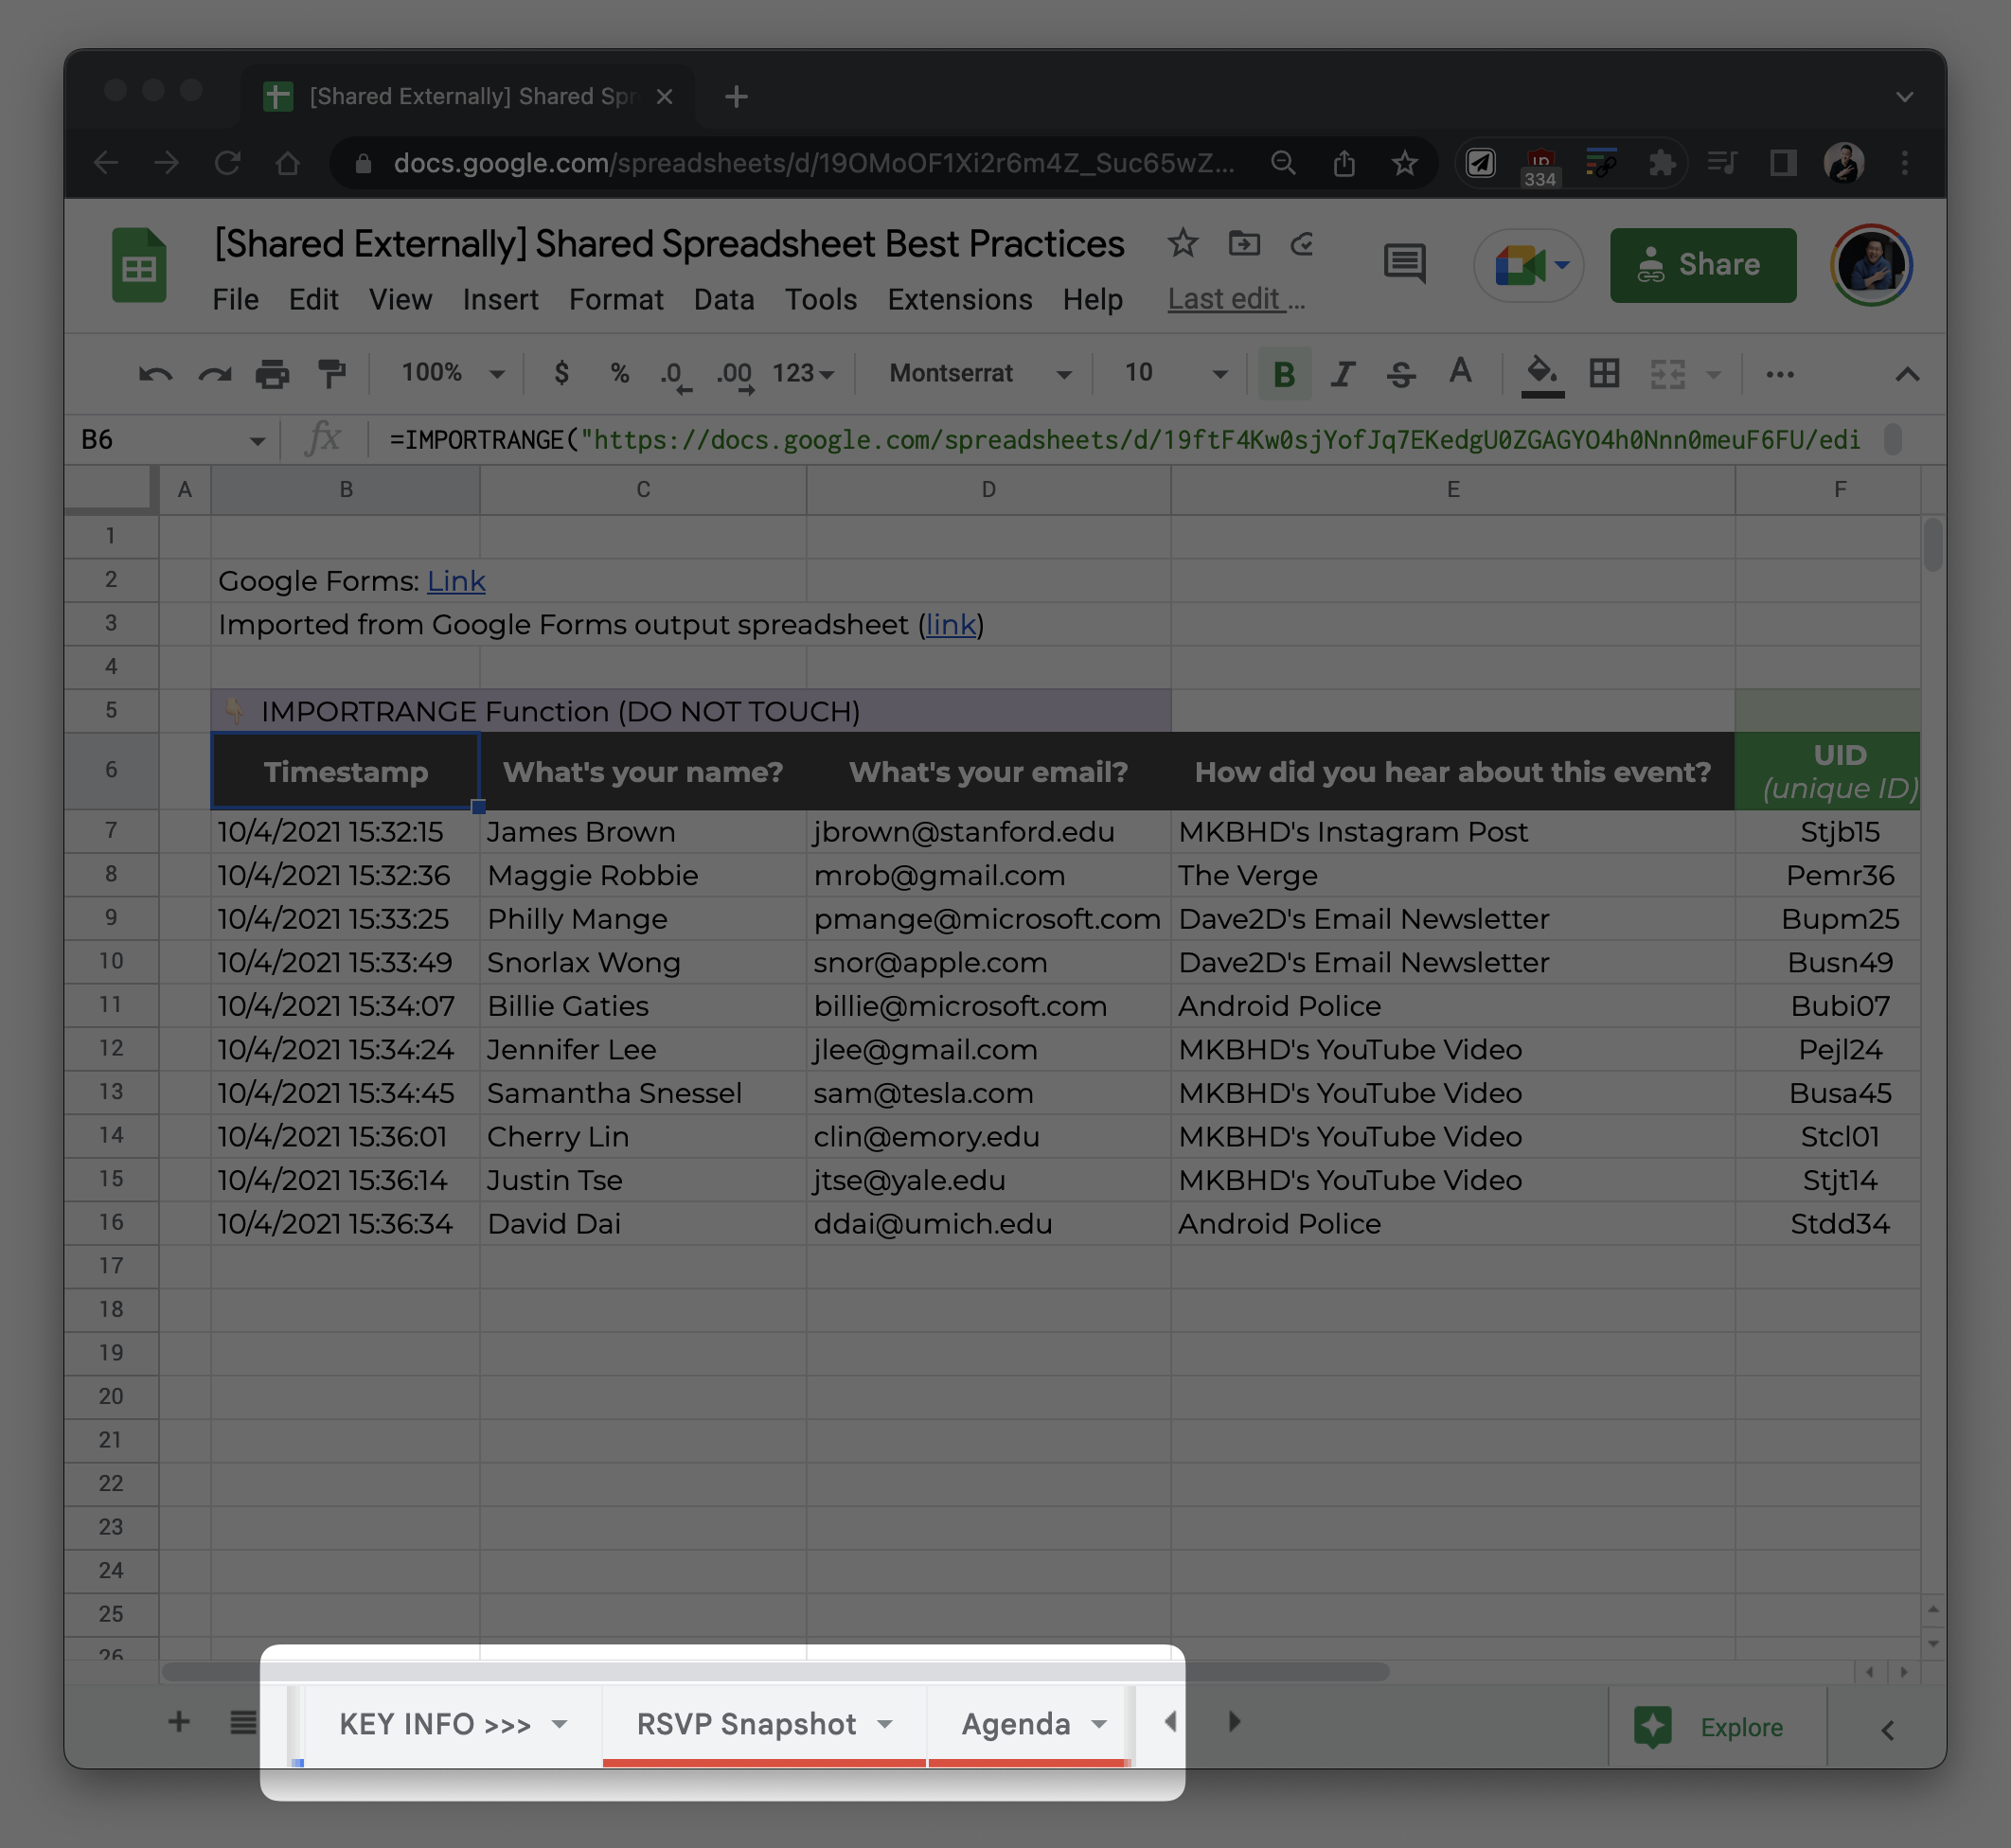
Think—if I had to show my manager the most important information about this project in 5 minutes, what would I prioritize? 🤔
For an event, we might prioritize the number of sign ups and topics to be shared as the most important tabs. For more complex projects and spreadsheets, it’s good to have a “Read Me First” tab that breaks down instructions, definitions and links to relevant files.
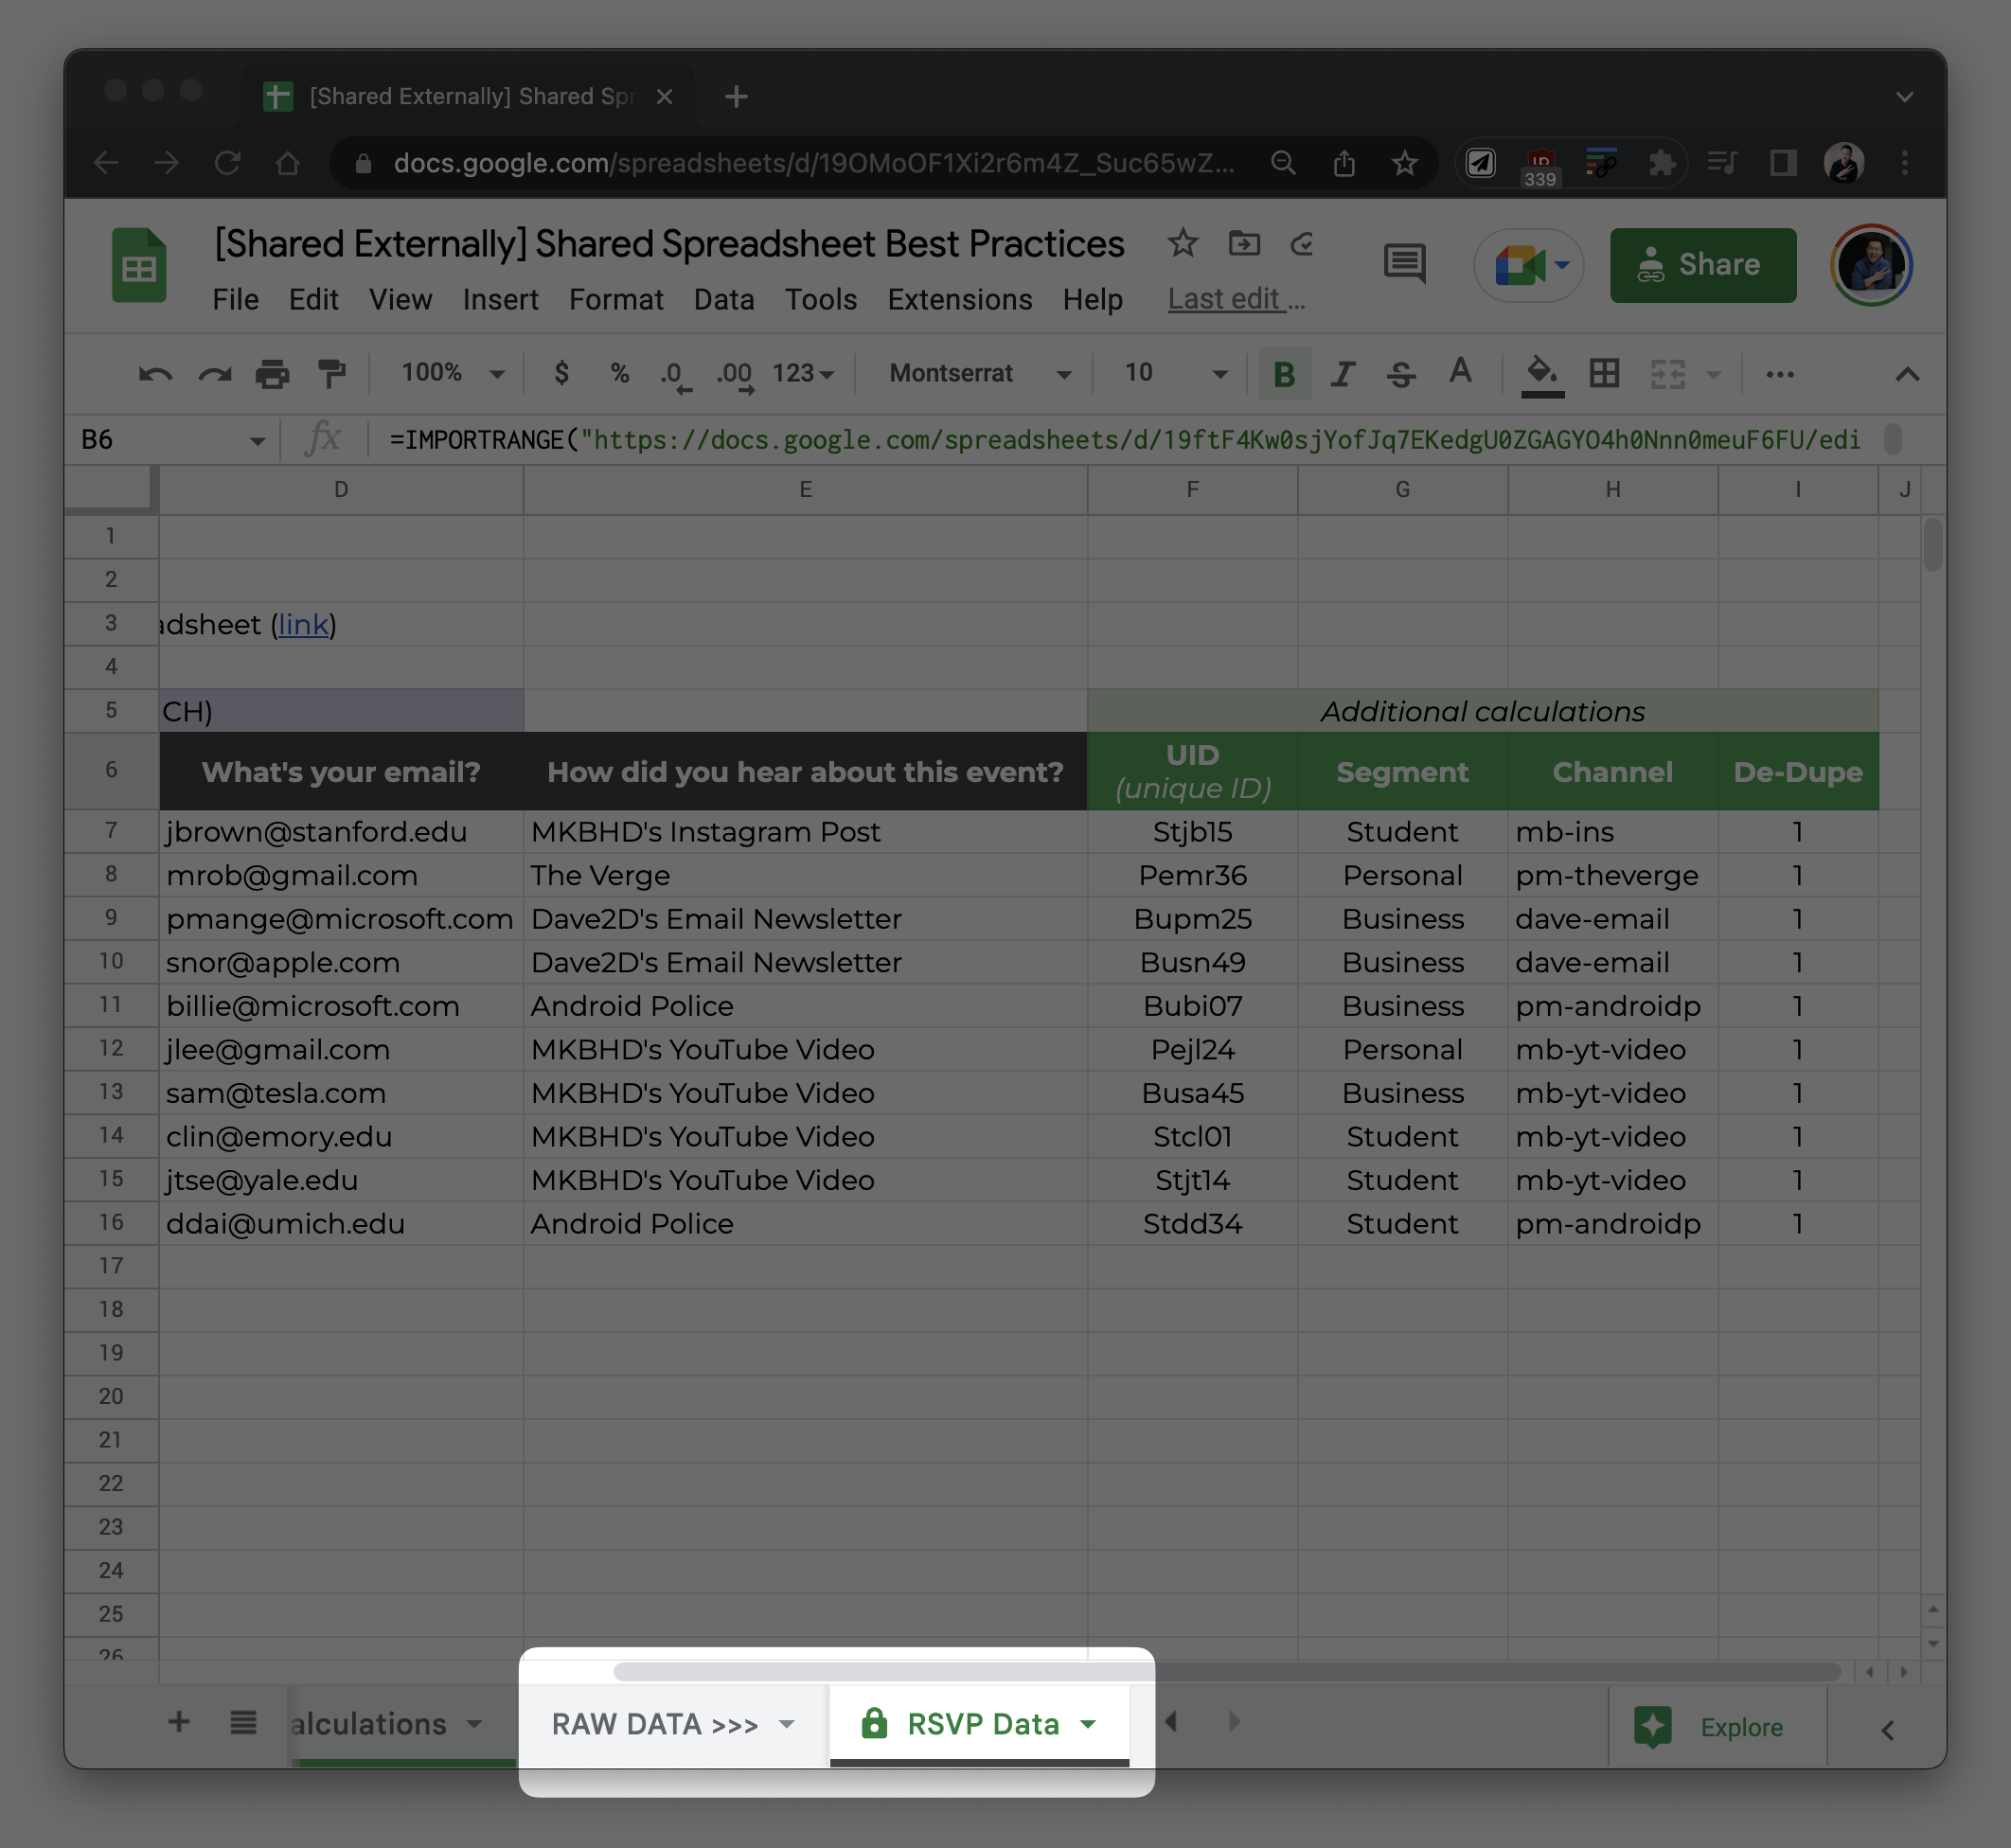
It may be helpful to separate your raw data tabs so only the core working group can make edits.
A perfect spreadsheet is useless if your teammates don’t know how to use it or access it. 🤷🏻♀️
During team meetings or in follow-up emails, always hyperlink the spreadsheet with the appropriate URL
Check out these Google Sheets tips to really hammer home your spreadsheet knowledge!